Chapter 1: The Basics
[This article contains affiliate links which can give a small financial kickback to me with no added cost to you. Affiliate links do not indicate a paid relationship with any given product or manufacturer of the product, simply an affiliate partnership with the online store.]
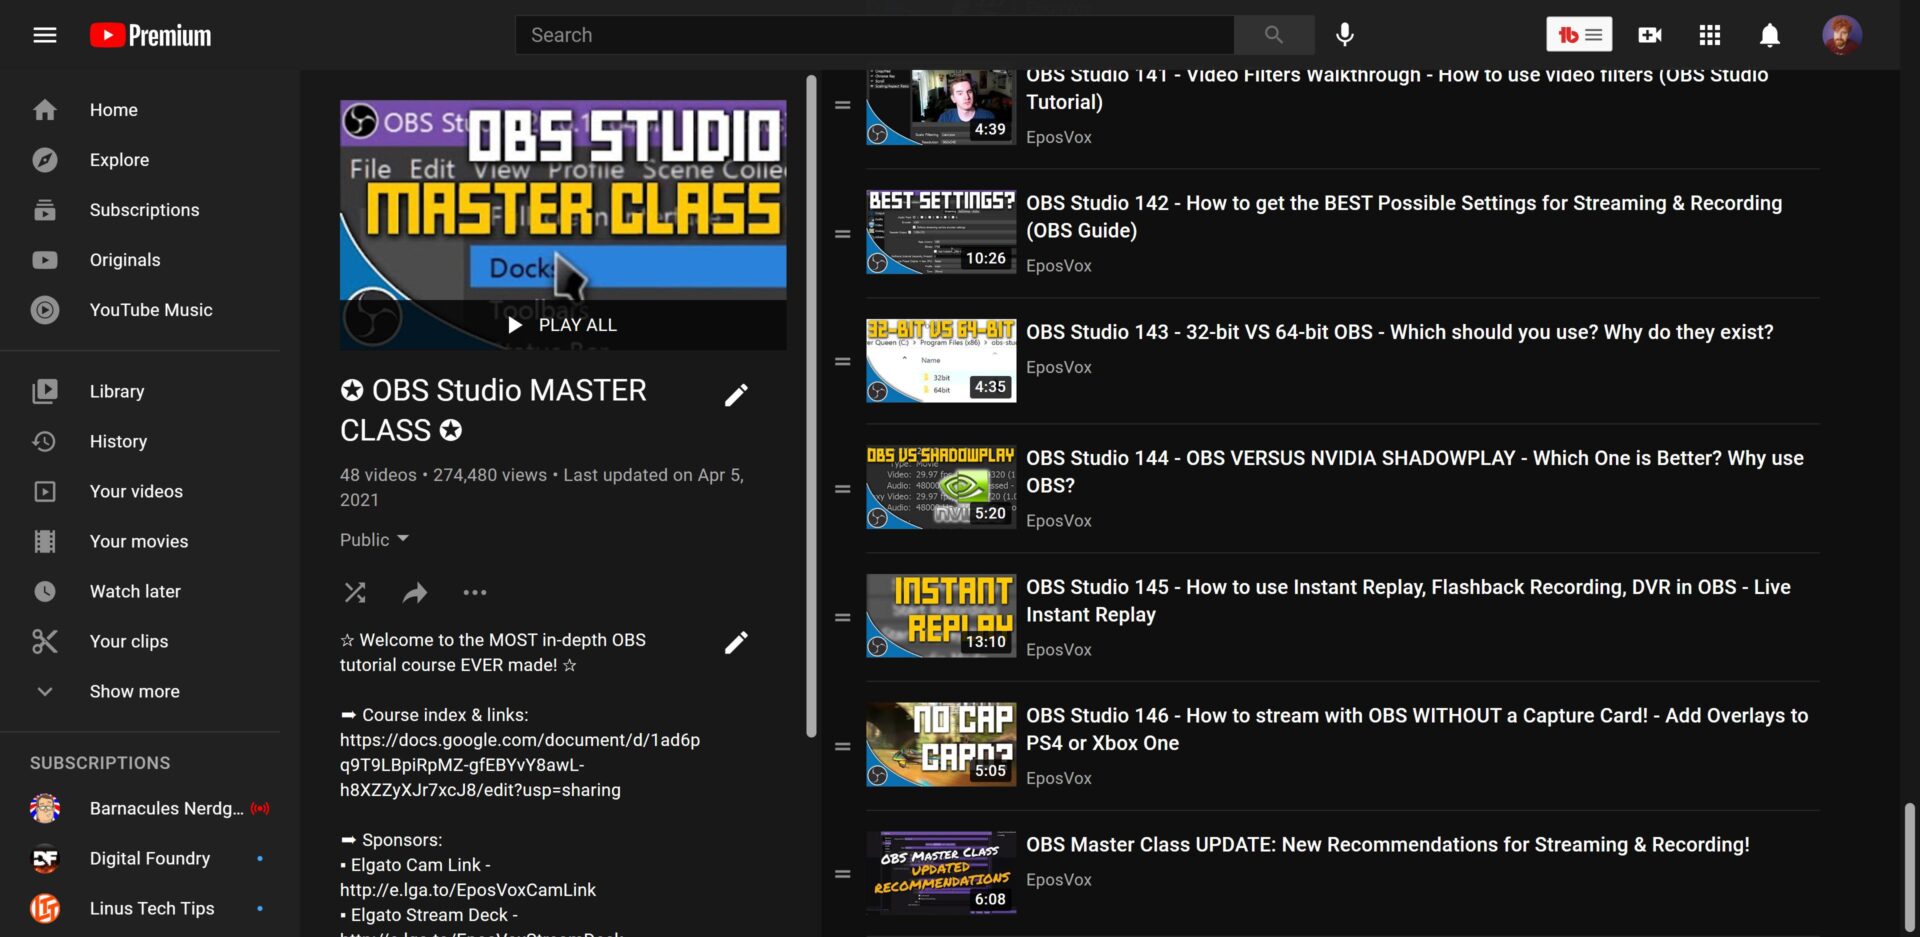
01 – Introduction to the Course
Welcome to my new OBS Studio tutorial course for 2017. I’ve previously created a large number of tutorials for past OBS versions, but things have changed enough in recent years that I wanted to provide a detailed, in-depth series of videos covering how to set up, optimize, and use OBS Studio for recording videos, podcasts, or creating dynamic and engaging live streams. I truly believe this is THE BEST and MOST IN-DEPTH OBS tutorial course available online.
This is my “Master Class” for OBS Studio. I’ve spent basically all of 2017 researching, scripting, revising, shooting, and producing this course, and I’m quite proud of what it’s become. This should be a fantastic all-in-one reference guide with the software, with just minimal updates required for new features.
This course will primarily focus on the Windows version of OBS Studio. I have some minor points that reference differences with macOS and Linux setup, but I cannot currently go in-depth with those versions at this time.
Also, this video is available in a full 4K UHD 60 frames per second format. This will give you not only the best visual quality, but the best clarity for viewing text and settings menus.
Relevant Affiliate Links:
-
- ReStream
- Save 35% off any paid orders w/ coupon code EPOSVOX
- Amazon Affiliate Link
- B&H Affiliate Link
- Kit.com
- TubeBuddy
- Also just generally assume any store links throughout this guide and the course are affiliate links of some sort (Amazon, B&H, eBay, etc.)
- ReStream
02 – User Interface
Before we can jump into the crazy advanced settings and configurations of the software, you really need to take some time and get familiar with the UI – or user interface – of Open Broadcaster Software.

03 – AutoConfig
During the creation of this educational course, the OBS team released a big “19.0” update, adding in some great features and fixes to the software. One such feature is the new “Auto-Configuration Wizard” which allows you to easily get running with optimized stream settings without having to learn the software in and out.
To access OBS Studio’s Auto-Configuration Wizard, click the “Tools” menu at the top and select it. Let’s walk through the different scenarios provided. Please keep in mind that this tool is currently in beta and may receive updates over time, but the same general principles will still apply.


Chapter 2: Scenes & Sources
04 – Profiles & Scene Collections

Now that we know how the UI in OBS Studio works, it’s time to take a dive into Profiles and Scene Collections and discuss how you might utilize these to really get the most out of the software.
In a nutshell, “Profiles” are different settings presets that you create. These affect your streaming and recording settings – bit rates, resolutions, etc. “Scene Collections” are saved groupings of your scenes and sources – including audio devices.
By creating and naming Profiles, you can manage many different groups of streaming and recording settings for different use cases. This is super handy if you do a lot of different forms of streaming and recording. I have a ton of profiles, as I use OBS for just about everything these days.
For example, I have different profiles for streaming to Twitch, streaming to ReStream for going to Twitch and YouTube at the same time, direct recording to disk in the highest possible quality from consoles, recording for my tutorials, webcam recording settings, and so on.

Profiles affect just about everything in the “Settings”, but they do not affect your audio devices – your microphone inputs, desktop speaker outputs, and so on. That can be easy to confuse, so usually, you’ll want a specific Scene Collection for each Profile.
The “Scene Collections” menu has the same options as the Profile menu for duplicating, exporting, making new Collections, and so on. Where the Profiles affect your settings, Scene Collections affect your scenes, sources, and audio devices.
Usually, you want specific Scene Collections to go with your various Profiles. I usually name them the same thing to keep it simple. i.e. my “Twitch” Scene Collection matches up with my “Twitch” and “ReStream” Profiles.
It’s also worth noting that your video resolution is still controlled by the Profile, so a Scene Collection of 1080p sources made to run at full 1080p will not look right with a 720p Profile. That being said, different Scene Collections for controlling video devices differently can be super helpful for managing complex setups with multiple monitors, input devices, and so on.
All of my scene collections match up to my Profiles. My Twitch Scene Collection contains the graphics, overlays, capture card inputs, and audio mixing for my Twitch live Streams. My “Tutorial Recording” Scene Collection contains the Desktop Capture modes for my 3 monitors along with a scene switcher config for recording tutorials. My “Webcam” Scene Collection contains full-size scenes for my Webcams. Pretty straightforward.
05 – Scenes & Sources
Scenes and Sources go hand-in-hand and are essential to setting up a recording or live stream with OBS Studio. Sources are your… well… sources of data for your stream. Video input devices such as webcams and capture cards, desktop monitor captures, game inputs, microphones, images, website overlays, and so on. There are many different source types available. It’s a good idea to familiarize yourself with the options available.
- Audio Input and Output capture allow you to add audio devices to specific scenes that you don’t want to be globally available. Sometimes you want specific things added only within certain scenes – such as adding a music track to a “BRB” scene or something like that.
- BrowserSource is a super fun one for live streaming. This is what streamers use to get their follower alerts and other pop-up elements on their streams. By adding a BrowserSource, you can input the URL of a website. TipeeeStream has a very advanced overlay editor that you can use to set up just about anything, whereas StreamLabs has a solid, but more limited feature set. I use StreamLabs during my streams.
- Color Source is just that – a solid color. You can give it a width and a height, and choose the appropriate color for your needs. This can be handy for backgrounds or chroma keying graphics.
- Display Capture is a direct feed from your monitor. You can choose between multiple monitors if you use more than one, and you can choose to show or hide your cursor, which is handy.
On computers with a single graphics card, this works perfectly, but on lower-end desktops or laptops with both a discrete graphics card used for gaming and a graphics handler built into the CPU, this can be finicky, as the two graphics cards handle different things in your computing experience – and OBS can only use one at a time. So you may end up with a black screen in your game but Display Capture works fine, or a black Screen for Display Capture but games work fine. In this case, you’ll have to set up different profiles and Scene Collections for different activities. - Game Capture is great for capturing games or full-screen applications. This creates a hook within your graphics driver to capture the direct feed from the game, much like how older recording programs such as FRAPS and Dxtory worked. As with Display Capture, if you have multiple display devices in your system, there can be issues with black screens. Just tinker around changing your Display Device in the “Advanced Settings” to try to fix it.
- Image Source is what you would use for adding stream overlays, webcam frames, and so on. I use an overlay for some of my stream scenes. Many streamers use overlays, watermarks, and webcam frames to add a little more flair to their streams.
- Image Slide Show is useful for, well, slide shows! Whenever my stream is just starting, I need to run to the bathroom, or my stream is ending, I use slideshows to cycle between slides saying “Stream is Starting Soon,” “BRB” or “Offline” and slides for my various sponsors or affiliate codes.
- RealSense Green Screen Source – If you have a high-end Intel-based system and an Intel RealSense webcam, and chose to install the RealSense driver package while installing OBS, you can set up the RealSense green screen webcam view as a source, as well.
- Media Source adds a music or video file. You actually have two ways to set this up – “Media Source” or “VLC Media Source.” This is for compatibility purposes with some systems. If the video isn’t playing back properly on your system, you can try switching to the other kind of Media source and see if it has better results.
- Scene Source – Next up, you can add a scene to your… scene. This kind of “nesting” is an important part of video production.
- Text Sources add text to your scene. You can customize the font, size, and so on. It can automatically load text from a text file and keep it updated. This is used to show the “Now Playing” for currently-playing songs, as well as the StreamLabs Stream Labels I use to show my recent followers and donations, and so on.
- Window Capture is for what it says, capturing windows. This is useful when you want to show literally only what’s happening within a specific window (for showing work in a program or non-fullscreen game) without showing anything else you do on your desktop. And it keeps showing whatever the window is doing, even if you bring other windows in front of it on your computer. Some streamers use this to show the Twitch chat in their live stream. Window capture is also beneficial because it captures the same view of the window, even if you move it around your screen, whereas with Desktop Capture you’d have to adjust your scaling and cropping once you move the window. You can still choose whether or not you want the cursor to show in the capture.
I use this to stream Old School RuneScape. I only want to capture the game, and I want the same capture to happen no matter where the game is on my screen. Window Capture works perfectly here.
Video Capture Device is the fun one. This is for external video devices, usually via USB. This is for your webcams and capture cards, important stuff. I use 2 webcams and 3 capture cards within my system, so they’re quite important to my streams.
Add a Video Capture and choose the correct device – you’ll recognize it from there. Then you choose “Custom” next to “Device Resolution” and choose the appropriate options. For example, with my Logitech C922 webcam, I set it to 720p 60 FPS, but my BRIO webcam is 1080p, 60fps. My capture cards all get pulled in at 1080p, 60fps.
You can mess around with color spaces, video formats, and custom audio devices – a necessity for the AverMedia Live Gamer HD 2 – but for most things the defaults are fine.
For all sources, you can click the setting cog while selecting the source to change the preferences again.
It’s worth noting that if an added Source is removed from all scenes, it will disappear from the list of sources of that type and you will have to set the source up all over again. If you remove the source, but it’s still present in other scenes, you can add it again by Adding a Source, selecting the type, then choosing it from the list when it asks you to name the source.
If you right-click a source, you can apply de-interlacing and scale filtering, if necessary (you’ll know what those are if you need them), or add a “Filter.”
Filters are basically effects for the audio and video of your source. For video filters, you can crop, mask, add color correction, chroma key or green screen, apply camera LUTs, and add a sharpen filter. For audio filters, you can apply additional gain to make it louder, correct for a delay in your video, add a noise suppressor or noise gate, a compressor to even out your audio, or a more complex VST plug-in.
We cover some of these more in-depth in future videos.
To resize or reposition Sources on your canvas, click on the Source – either in the video preview or in the Sources list – and a bounding box will appear. Click and drag to move it around, or use the circle corners to resize. Holding Alt while doing so will crop the Source, as desired.
You will also see a small lock symbol next to individual Source names in your Sources list. This allows you to lock a Source in place and prevent it from being moved or resized. This is super handy if you have some primary, full-canvas Sources like gameplay, desktop captures, or a full-scene facecam shot that you don’t want to get messed up. It’s super easy to be working away at moving and resizing Sources and accidentally click the bottom layer and move it way out of whack. This helps prevent that and is a huge convenience buff. Use it well. Once you have some static Sources in your scene that you don’t plan on ever moving – i.e. not your overlays – might as well make sure you lock them before moving further.
06 – Multiple Scenes?
After my last round of OBS tutorials, a question I got quite frequently was asking why one might want to use multiple scenes in OBS Studio. Why not just throw everything into one scene and switch from there?
Well, for many reasons.
For one, a good stream has things configured in a polished way – such as your stream alerts being sized correctly to not block too much of the stream or your face, your facecam in a small corner so you can be seen without blocking gameplay, and so on. If you try to shove everything in one scene, then things won’t look right at all. Alert sizing fits differently overtop of gameplay and a desktop view, for example. Plus, you can’t have both a full-size webcam view and a cropped, small corner facecam in the same scene.
By setting up different scenes with things sized out and set up appropriately in separate scenes, you can create an awesome stream. The professionalism and polish will be appreciated by your viewers. The same goes for when you switch scenes. Fiddling with your mouse to show and hide sources or move things around looks really bad to an audience.
The more seamless your streaming experience can be for your viewers, the easier of a time you’ll have gaining new followers and keep them around.
If you do different kinds of recording with OBS Studio, setting up separate scenes can save you time, too. A webcam scene with a full-screen webcam view for vlogs or channel updates, a gameplay scene for gameplay recording, a gameplay facecam scene for live sessions, a desktop scene for tutorials, and so on.
07 – Scene Nesting
There’s probably no end of uses for nesting scenes within OBS Studio, but I have found a few which seem to be particularly useful.
One use is to get around the annoying issue of sources being “global” and showing any changes you make to them in all scenes.
Another more advanced use of scene nesting is how I handle my stream alert overlays. Instead of adding individual browser sources, image files, and text reads to each scene to compose my layout, I just made a scene called “Overlays” that I can add to each scene I want it on. Then, if I update the “Overlays” scene, any updates are passed to every scene it’s nested in, saving me a lot of time.
If you want to have an alternate layout where your normal webcam or gameplay view is next to live chat, or you have your normal gameplay view with overlays next to your webcam or someone else’s stream view, you can also use scene nesting to make this work.
08 – Source Video Formatting
- About WebM: https://www.webmproject.org/about/faq/
- Download “WebMBRO” https://github.com/WebMBro/WebMConverter/releases
- WebM Plugin for Adobe Suite (CS6+): http://www.fnordware.com/WebM/
- How to convert to WebM with FFMPEG: https://superuser.com/questions/556463/converting-video-to-webm-with-ffmpeg-avconv
While, depending on your system specs and such, most video files will work just fine as media sources within OBS Studio, you can make your life easier by converting your sources to lighter formats to make OBS do less work.
For ease of use within OBS Studio, I actually recommend using the WEBM video format. This is an open-source media file format designed for the web and will let you convert your graphics, intros, or video clips to small compressed video files that are easy to keep together within a “Stream Resources” folder and playback smoothly in OBS Studio without worrying about performance.
Chapter 3: Audio & Mixing
09 – Audio Devices & The Mixer
Full production setups – be it for live broadcasting or post-production – use lots of big mixer boards for managing many audio tracks, sources, and devices. This is critical to creating a well-mixed final audio track for a video. While you can achieve much better results by utilizing a real mixer for live streaming and many of the top streamers do so, OBS’s built-in Mixer is great for managing audio for a small or more normal workflow stream.
Make sure the correct audio devices are selected in the “Audio” settings:

Check the correct tracks in your “Output” settings:

BE SURE to separate tracks via Edit – “Advanced Audio Properties:

10 – Mixer Master
The slider adjustments are reflected in the number on the far right, measured in decibels. Keep in mind this is not a measurement of your audio levels, simply how much you’ve reduced the input.
Where your sliders should be will vary based on your setup, but for full-volume inputs, I usually knock my game sound and background music to around minus six to minus seven dB. The most important rule to keep in mind here is to do many test recordings to make sure things are set up correctly. I get asked all the time “How do I make sure volume levels are right before I stream?” Do a test recording. Every time you change something, do a test recording and play it back to see how it sounds. Every. Time. Do. It.
11 – Audio Monitoring
The “Audio Monitoring” feature in OBS Studio allows you to listen to the audio of a source, even if it’s set to go to the stream only. This can be used sort of in place of a proper physical audio mixer for hearing your own microphone through your headphones or monitoring game sound from a capture card, and so on.

Click “Edit” and then “Advanced Audio Properties.” This can also be chosen by the gear icon next to individual sources. This opens up the “Advanced Audio Properties” dialog. In the previous tutorials, I showed you how to use this to separate your audio tracks and so on. Here you also have the ability to monitor your audio sources to your headphones.
By default, all sources are set to “Monitor Off” for… obvious reasons.
You have two other options available to choose from: “Monitor Only (mute output)” and “Monitor and Output.” These are mostly self-explanatory. “Monitor and Output” allows you to both loop an audio source to your headphones and push it back to the stream. This can be useful if you have an audio track going but for whatever reason don’t want it directly being checked in the mixer and going straight to the stream. I… honestly can’t imagine a reason for this other than addressing issues with the other option. We’ll come back to this in a second.
“Monitor Only (mute output)” aims to just loop the audio source to your headphones so you, too, can hear it, without it echoing to your stream. Typically this is for microphone loopback or hearing game audio from a capture card, or the like. But this doesn’t always work.
Before screwing more with OBS settings, right-click your speaker icon in your Windows System Tray and click “Recording Devices.” Go through each of them – click “Properties” then click the “Listen” tab, and make sure “Listen to this device” at the top is unchecked. Having this checked will already loop the sound through your computer speakers as is. You want this off.

12 – Splitting Audio Tracks w/ Audacity
- Download Audacity: http://www.audacityteam.org/
- Download the FFMPEG Plugin (NOT the LAME plugin!!): http://lame.buanzo.org/#lamewindl

Once properly installed, just drag your video into Audacity:

13 – Looping Audio
There’s a couple of potential causes of an echo in your stream. The ones we’re going to cover here are mostly obvious. If this isn’t it, then you may have to hop into the forums and get help.
First and foremost, the number one cause of stream looping and echoing comes from having a video preview up while you’re streaming. Both Twitch and YouTube – along with other streaming sites – give you a video preview panel to make sure all is A-OK with your stream. This is great, but if you leave it unmuted and playing, it can cause a horrific echo loop. Plus it eats up more bandwidth and potentially takes away from the stream quality. So make sure your video preview on your streaming site is muted or closed. In Google Chrome you can actually right-click the browser tab and mute it outright, which is quite handy.
This is usually what causes the echo.
Of course, make sure you’re using headphones instead of speakers while streaming, otherwise, your game sound or voice chat will echo back into your microphone.
Also, if you’ve messed with the new audio monitoring feature, it’s possible that is looping something back to your stream. Even though one of the options is specifically designed to not loop the audio back to your stream, it still happens. Audio drivers and playback are finicky beasts, and sometimes it just doesn’t work out. Disable those when troubleshooting an echo loop.
Similarly, some USB headsets or microphones cause audio echoes, loops, or other issues. Try streaming without the USB device in use or plugged in and see if that is the source of your problem.
14 – Audio Filters
- Compressor can make your voice sound a little more punchy or uniform and helps prevent peaking and clipping from screaming, shouting, yelling, or other loud noises. It can also raise the noise floor of ambient or background noise, however.
- Gain does just that – adds gain to your microphone’s “volume” level. Always try to raise levels via your hardware or Windows Recording Device options first, but this is an option.
- Next, you have Noise Gate and Noise Suppression. Both of these work to help reduce background noise but in different ways. Both can also make your audio sound pretty bad if not set up right. Always treat your recording environment before trying software options.
- Noise Gate just cuts off the mic below certain thresholds – but can make obnoxious pops to the listener.
- Noise Suppression just tries to filter out quieter noises but can make your voice sound… funky.
- Video Delay (Async) lets you add a delay, measured in milliseconds, to your video source to better align it with your audio inputs. This is useful if you have an out-of-sync USB device.
- Lastly, you have VST plugins. We cover these and show a free option in episode 115. VST plugins are third-party plugins that can be used for even crazier, or just higher quality, audio processing.
15 – Audio processing w/ VST
- Reaper ReaPlugs (FREE): https://www.reaper.fm/reaplugs/
- Video shown with VST effects on a piano: https://www.youtube.com/watch?v=47Ch7RJqlGo
To add a VST plugin effect to your microphone, assuming you already have your stream set up as per the rest of the videos in this course, click the gear next to your “Mic/Aux” entry in the audio mixer and click “Filters”. Then click the plus in the bottom left corner and choose “VST 2.x Plug-in.” Give it a name based on what effect you’re using and hit okay. Then choose your VST Plug-in from the drop-down menu.
-
- ReaComp is a compressor
- ReaEQ is an equalizer
- ReaDelay adds a delay
- ReaGate adds a noise gate
- ReaFir is a dynamics processor – applies multiple effects at once
- ReaXComp is a multi-band compressor.
- The others should be ignored for the most part, unless you really know what you’re doing.
BONUS: Choosing a Microphone for Streaming
- Mic reviews playlist: https://www.youtube.com/playlist?list=PLzo7l8HTJNK9HeJ9Qmm6WcA7LUf5uwqOJ
16 – Mixers/Interfaces
Referenced products and their reviews:
- SUPER CHEAP AUDIO SETUP – Monoprice 600020 Microphone Review & Behringer Xenyx 302 USB Mixer Review – https://www.youtube.com/watch?v=KlqqWdxjnR8
- RME Babyface Pro Review // MAGIC LITTLE AUDIO BOX – https://www.youtube.com/watch?v=OR0l-9v9n_w
- WVOX VOX RADIO – My BUDGET Hardware Audio Processing Rack Setup & Tour – https://www.youtube.com/watch?v=0KzMx2FC0bk
- FLEXIBLE & QUALITY INTERFACE | FocusRite Scarlett 2i4 USB Audio Interface Review – https://www.youtube.com/watch?v=wEjY76kNsPs
- Focusrite Scarlett 2i2 Review (USB Audio Interface) – https://www.youtube.com/watch?v=7XgOvIKX6z8
- FLEXIBLE & QUALITY INTERFACE | FocusRite Scarlett 2i4 USB Audio Interface Review – https://www.youtube.com/watch?v=wEjY76kNsPs
- Behringer XENYX X1832 USB Mixer Unboxing & First Looks – https://www.youtube.com/watch?v=yT5B5kqMF0U
BONUS: Filtering/Cleaning Audio
- Ground Loop Isolator: http://amzn.to/2dPhwCw
- Ebtech HumX: http://amzn.to/2e6YfR1
- Power Conditioner: http://geni.us/RKhJL
Chapter 4: Video & Bitrates
17 – What format should you record in?
By far, the most compatible format you can record to in OBS Studio is MP4. Most video editors and YouTube itself tend to work best with the MP4 container. It’s also compatible with multiple audio tracks, which FLV is not.
The problem with MP4, though, is that it’s prone to corruption very easily. If OBS crashes, your computer loses power, or sometimes even if just an audio device disconnects while recording – the whole recording gets corrupted and unrecoverable.


The best option for recording is to record to MKV. MKV allows the file to still be saved, even if your computer crashes or OBS crashes or gets closed mid-recording. You generally can’t edit MKV files, but OBS lets you “remux” the file back into an MP4 file that you can edit, with the multiple audio tracks intact.
18 – Recording Settings
OBS Studio is great for streaming, but I also use it for recording just about everything, too. Thankfully, the interface for recording settings is pretty similar to streaming settings – but there’s some specific tweaks we can make to get better quality or higher performance.
BONUS: Why Record to a Second HDD?
I’ve talked before about using a secondary hard drive to record to when recording gameplay, but I haven’t had the opportunity to dig into WHY that is. Here you go.
- USB 3.0 – Everything You Need to Know in About a Minute – https://www.youtube.com/watch?v=BvuGifhoBvY
(Yes, obviously your enthusiast super-fast SSD/NVMe drive is a different story.)
19 – Bitrate Considerations
A word that gets frequently thrown around when discussing video recording and editing is “bit rate.” What does that mean?
This phrase refers to the data rate of your video recording or stream. Usually referred to some amount of bits per second. Don’t confuse this with bytes – we normally measure files in bytes, megabytes, and gigabytes, but bits are different. Size-wise, bits are one-eighth of the size of a byte. This actually makes it easier to talk about when it comes to streaming, as if you run an internet speed test, it measures this in megabits instead of megabytes.
A higher bit rate equals more bits per second which generally means higher quality. But depending on your upload speed, computer specs, and so on – you may not be able to use a higher bitrate. Or, if you set it absurdly high, eventually any quality increase might be insignificant especially compared to the cost of the high file size that will be created by such high bitrates.
- Bits & Bytes Explained: https://www.uswitch.com/broadband/guides/bits_and_bytes_explained/
- Google Fiber Pricing Tiers: https://fiber.google.com/cities/louisville/
- Twitch Broadcast Requirements: https://help.twitch.tv/customer/portal/articles/1253460-broadcast-requirements
- Twitch 1080p Streaming Support: https://blog.twitch.tv/1080p-streaming-support-on-twitch-fea5e1945ae1
- Twitch Transcode Upgrades: https://blog.twitch.tv/transcodes-are-leveling-up-98d40f2c8405
- HDD vs SSD – What’s the Difference – CareyHolzman: https://www.youtube.com/watch?v=O4ykrNhI5xk
- YouTube Help – Recommended upload encoding settings: https://support.google.com/youtube/answer/1722171?hl=en
- SpeedTest: http://beta.speedtest.net/
- OpenSpeedTest: http://openspeedtest.com/
20 – Crazy Recording Possibilities
First, let’s look at FFmpeg.
Hidden in plain sight within the “Advanced” mode of Output settings for recording is a setting toggle that very few people even know exist, but opens a wide world of additional recording possibilities. Under the recording tab is a dropdown that says “Type – Standard.” Ever noticed it before? Probably not.
For like 99% of uses of OBS, leaving this on “Standard” is necessary. But if you change it to “Custom Output (FFmpeg),” you can record to just about any file format that the FFmpeg program is capable of. Admittedly, I don’t have a ton of experience with FFmpeg’s normal tools and command-line capabilities – but there are plenty of resources available online, I’ll have some linked in the video description.

21 – Record Lag-Free w/ Hardware Encoding
With Nvidia graphics cards or newer AMD graphics cards, you have the option of selecting the hardware encoder within OBS studio to do the processing for you. For AMD cards this is called “AMD Video Compression Engine” or “VCE,” for Nvidia it’s called “Nvidia Nvenc.” To use this for your recording or streaming, go to your output settings and see where it says “encoder” and “x264.” Click the dropdown and change it to VCE or Nvenc.
This records and streams without lag, as it utilizes the extra processing headroom on your graphics card to encode the video. Graphics cards have always had (and advertised) video encoding capabilities, but we’ve never had the tools to use it. Now we do.

Some Intel processors also have “Intel QuickSync” encoding options available for this, but the video quality is significantly worse with QuickSync than normal x264 or the other hardware encoding options. It’s worth trying if it’s available to you, but don’t be surprised if you don’t like the result.
A general word of advice here, though: streaming with hardware encoding at low bitrates looks much worse than using x264. X264 looks much better at low bitrates, whereas hardware encoding actually tends to look better than x264 at higher bitrates. So generally it’s recommended to use hardware encoding for recording since you’ll be using high bitrates and x264 for streaming at low bitrates. That also still relieves some of the pressure on your CPU if you stream and record at the same time.
If your system still struggles with x264 for streaming, you can use hardware encoding for it, it will just not look quite as good. The choice is yours.
- AMD VCE Explained: https://en.wikipedia.org/wiki/Video_Coding_Engine
- Nvidia NVENC Explained: https://en.wikipedia.org/wiki/Nvidia_NVENC
- Intel Quick Sync Video Explained: https://www.intel.com/content/www/us/en/architecture-and-technology/quick-sync-video/quick-sync-video-general.html
22 – Recording & Streaming at the same time
OBS Studio has separate “Start Streaming” and “Start Recording” buttons which allow you to control recording and streaming separately, but you’re able to do both at the same time. Even better – you have the option to record either the same quality copy that you live stream, or record a much higher quality copy locally. This is a pretty powerful feature, and it may require powerful computer hardware to make work.
To set this up, all your really have to do is make sure your “Output Mode” is set to Advanced in your profile, and customize your recording and streaming settings separately. For example, I stream to Twitch using x264 at around 6 megabits per second, but record locally using Nvidia Nvenc at 30 megabits per second. Get your settings set appropriately, hit apply, and then make sure you hit start recording alongside start streaming.
If you have the ability to utilize hardware encoding from Nvidia or AMD, it’s generally better to use that capability for recording locally, and x264 for the live stream. X264 codec looks better at low bitrates whereas Nvenc or AMD VCE looks better at high bitrates.
BONUS: Choosing a webcam for Streaming
- Webcam Reviews playlist: https://www.youtube.com/playlist?list=PLzo7l8HTJNK-CGvkUG674cKwWP-IlNf0B
BONUS: Choosing a Capture Card for Streaming
- Capture Card Reviews playlist: https://www.youtube.com/playlist?list=PLzo7l8HTJNK9dN_ABiv1X9mxEM744pZxC
Chapter 5: Dynamics
23 – Troubleshooting Internet Problems
First and foremost, please do realize that literally everyone’s setup is different. Your internet provider, internet connection, router and other networking hardware, computer, software running on your computer, version of Windows, expectations, patience, other devices on your network – every tiniest detail of your setup will be different from everyone else’s. Because of this, I likely will not have a single, specified and directed answer that will fix your problems – but rather I aim to simply aid you along your way of troubleshooting what problems you might have.
And remember, OBS does have a dedicated forum you can use to submit logs and specs and try to get a solution to your problems, too. As will all complicated streaming setups, patience is very important.
- Tip Number 1 – plug in an ethernet cable. No, really. Wireless networking has come a long way in terms of raw, deliverable speeds, but it’s still crap for high-level work. It can increase your ping and is very prone to interference, signal degradation, and packet loss.
- Tip Number 2 – An obvious one, but one everyone skips, myself included. And then you feel bad about it. Turn off unnecessary services and programs.
- If you’re not running a Steam game, a BattleNet game, an Origin, UPlay, or whatever service platform game – don’t run the clients! Auto-updating for games or the app itself can kick in at any time and ruin your network performance.
- Similarly, close out of just about EVERYTHING else. Skype constantly loads ads and uses network traffic. Cloud sync apps are always pinging and syncing data. Bittorrent and Usenet clients are active. Overbearing firewalls and network monitors can cause your performance to degrade, too.
- If this is too difficult to pull off every time you want to stream, consider making a new user profile on your computer just for streaming. Only install exactly what you need for streaming, and don’t ever use it other than when streaming. Tweak it to prevent extraneous processes from starting up at sign in, keep it clean and easy to use.
- Tip Number 3 – Check your streaming servers. Make sure you’re not set to stream to a Twitch or YouTube, or whatever service, across the world. The closer you can get to your exact location, the better.
- Tip Number 4 – Use OBS’s new network tools. In “Settings” – “Advanced,” OBS Studio has new networking options available at the bottom.
- If you have multiple networking devices connected to your PC – for example a wireless card and wired ethernet jack – you can use the “Bind to IP” drop-down to force OBS to only use one device, preferably your ethernet connection, and prevent it from accidentally routing through wireless or something. This is also useful if you run separate internet connections entirely for streaming and other network usage.
- You can try checking the box next to “Enable new networking code” to see if it plays better with the stream servers. This code is supposed to help stream more efficiently, though not much is given about it.
- If you do check that box, you also have the option to check the box next to “Low latency mode” – which will stream in a more ping-friendly way to keep ping down. This will, however, use more system resources – but might be the fix you need.
- Tip Number 5 – Lastly, if you’re consistently having issues streaming and your bit rates are well within your available bandwidth, check with your ISP. Give them a call and work with them to stress test your modem, router, and networking hardware to see if you’re having any signal loss, packet loss, or other connection issues that might be directly associated with them. While this was more of a problem in older dial-up and DSL networks, this can still very much be the source of many steamers’ headaches.
24 – Dynamic Streaming Setups
Setting up a facecam overtop your gameplay footage is a great start to connecting with your audience and making a great-looking live stream. But it doesn’t have to stop there; a basic facecam cam is just the beginning of what you can do.
- Those who are super MLG pro at a specific game – first person shooters, RTS games, and so on – implementing a keyboard cam, mouse cam, or controller cam might be a great idea. This is super easy to set up – just an extra camera mounted and pointed at your controlling device. This can be a webcam via USB or a camcorder or DSLR with an HDMI feed running to a capture card.
And yes, you can use multiple capture cards in one system with OBS Studio. You can use a LOT. This is how professional broadcasts work. Not only that, but you can get some capture cards with multiple inputs. Let that sink in if you’ve seen that as a roadblock previously.
- If you have multiple computer monitors and use them for a specific workflow, you can add them all to OBS and use a keypad with macros or an automatic scene switcher to switch between them. Or you can go a step further and add webcams on top of each so that you always have a facecam ready.
- If you’re not super picky about privacy and have an interesting setup, you can mount another camera – such as a wireless security camera streaming over the network, or just a webcam with a really long USB cable ran – on a wide angle further back from your setup to show off during your “be right back” scenes. Add a little blur and text overtop and you have a much more interesting scene than just a “BRB” slide. And viewers get to see behind the scenes, which helps make them feel more involved.
- You can utilize complex layout graphics or websites like TipeeeStream to make a more visually-appealing stream with extra layouts, graphics, Twitch Chat overlaid, views side-by-side, and so on.
- You can have multiple people streaming in one location, too! Run both game systems or PCs into capture cards to the streaming machine, set up facecams for both people, and switch between the scenes. Think about how major eSports events are set up and scale that down to your needs.
25 – Stream Alerts
Alerts are integrated using the Browser Source plugin built into OBS Studio to load a web page that gets green-screened out and whatever shows up gets overlaid on top of your stream. It sounds complicated, but OBS Studio makes it easy to implement.
- StreamLabs: https://streamlabs.com/
- TipeeeStream: https://www.tipeeestream.com/
26 – Multi-Casting
ReStream — Save 35% off any paid orders w/ coupon code EPOSVOX
27 – Custom RTMP Streaming
PSYNAPS:
- YouTube – https://www.youtube.com/user/rsmrt
- Twitch – https://www.twitch.tv/psynaps
- Twitter – https://twitter.com/psynapsfx
- Psynaps also offers pre-configured server setups AND mentoring for setting up your own – http://www.psynapticmedia.com/super-stream-system-by-psynaps/
- BitStream RTMP for Android: https://play.google.com/store/apps/details?id=ro.numedecod.cast&hl=en
28 – The Magic of NDI
- Download NDI Plugin for OBS Studio: https://github.com/Palakis/obs-ndi/releases/tag/4.1.3
- About the plugin: https://obsproject.com/forum/threads/obs-ndi-newtek-ndi%E2%84%A2-integration-into-obs-studio.69240/
- About NDI via Newtek: https://www.newtek.com/ndi/
- Newtek Spark: https://bhpho.to/2yPeutq
- BirdDog Studio NDI Converter: https://bhpho.to/2i8aYT5
NDI is a video transmission technology that has been in development by NewTek – the company that makes those awesome Tricaster streaming machines and really pushes innovation on the broadcasting front.
Well someone by the handle of “Palakis” has developed a great NDI integration plugin for OBS Studio and now we can take advantage of this awesome technology within OBS Studio.
Chapter 6: Advanced Control
29 – Hotkeys

To set a hotkey for a specific action, click in the empty box, and then use the command you wish to map. For example, Alt-F12 for start recording. If you want to make it a toggle so that the same keybind does both start and stop for streaming or recording, simply apply the same key bind to both listings.
You can also apply multiple key bindings to the same command with the plus sign. You can remove extra key bindings with the minus button.
You can clear keybindings from a command with the “clear” button. If you have a set keybind and accidentally replace it, you can hit the “revert” button to change it back.
The Elgato Stream Deck can make this process easier:

- Elgato Stream Deck: http://e.lga.to/EposVoxStreamDeck
- Elgato Stream Deck Playlist: https://www.youtube.com/playlist?list=PLzo7l8HTJNK-sza3KF_qAhTXVZvY_PDGa
30 – Advanced Settings
OBS Studio offers a small variety of additional features for those who know they for sure need them under the “Advanced Settings” tab. A lot of these are only useful in very specific situations, but we’ll try to cover what we can here.
- Process Priority refers to the priority to which your computer allocates resources. At “normal,” it’s possible on slower computers that OBS could freeze or have issues due to another program – such as a game – taking up more power. I believe it stays at “Above Normal” by default to help prevent this. If you’re using a slower computer and running into issues with OBS freezing or being unresponsive, you can try setting this to “High” – but be prepared for that to then potentially harm performance in-game or your other programs.
- The Video settings section is typically left alone. Direct3D 11 or 10 should almost universally be used, on Windows at least, and even on my rig this is my only option. You might have OpenGL available as well, which is worth trying for troubleshooting performance issues.
- NV12 is the best default “Color Format” to work with unless you’re using specific other Color Format devices and know what you’re doing.
- The “Color Space” and “Color Range” can typically be left alone. By choosing 709 and “Full” instead of 601 and “Partial,” you’re able to give more dynamic range to your video, allowing room for more color grading and so on. But without any tweaks, this can make your video look more “washed out.” This actually makes it easier to compress, but may not appeal to everyone.

- Next, you can choose your Audio Monitoring Device. This is for the “Audio Monitoring” tool in the audio Mixer that we covered in previous videos. This simply assigns an output device to be monitored to.
- Following that, you can change the file name formatting for recordings and replay buffers.
- You can also add a stream delay. This is important for major events or during competitive matches to prevent “stream sniping” – but the buffer for the delay can consume a lot of RAM.
- Next you can set up retries for automatically re-connecting to streaming services if connection is lost. You can disable this if needed.
- Lastly, you have some network controls. The OBS team have implemented better network code – which is vague, I know, but supposedly improves stream performance – which you can disable. You can also enable a “Low Latency Mode” which improves latency to stream but can use more system resources. You can also bind OBS to a specific network device if you have more than one different internet-accessible network adapters in your system.
31 – Transitions
To use transitions, you need to select one in the “Scene Transitions” menu module and click the dropdown. Here, you can choose a transition type to be active. Below this, you can change the duration of the transition period, in milliseconds. The default was 300ms for me, which is one-third of a second.
In-between these two boxes are buttons to add a new transition – something we’ll be using a lot – remove a transition from the list, and a settings cog to change transition settings.
As of version 20.0.1 and the production of this course, you can only set up a single transition to be used at a time. This means that whichever is showing in the dropdown menu when it’s not expanded is the transition that will happen when you switch scenes. The same transition carries over if you go into dual-view “Studio Mode”, as well. I would like to see the ability to add per-scene transitions so that you can use specific transitions depending on what you’re switching to. Quick cut transitions between multiple camera angles, but lengthier, stinger style transitions when going to BRB screens or between a game view and a desktop view.
The only way this can currently be done is via the “Advanced Scene Switcher” plugin that I use for auto scene switching, and this isn’t even for normal switching; just auto-switching. A video on this plugin is in the course playlist.
If you only see “Cut” or the original combo of “Cut”, “Swipe” and “Slide,” fear not – simply click the big Plus and you have the option to add custom transitions from a few new options.
- “Fade to Color” does as it sounds. Opening up its properties lets you choose a color – though keep in mind if you choose a custom color from the hue board, you will have to hit “Add to custom colors” and choose it from that list before applying.
- Otherwise, choose one of the color choices or click “Pick screen color” to get an eyedropper to pick any color visible on your screen. This one automatically adds to custom colors and selects it. Hit OK. You can also choose at which point during the transition that the full color should be 100% present and opaque. Typically you want to leave this at 50%. Hit OK again and now you can fade to your chosen color as a transition.
- You can add multiple Fade to Color transitions to switch between via the drop-down menu.
- Adding a “Luma Wipe” transition let’s you pick from a preset list of transition modes typically used as the built-in presets for video editors. This gives you a wide selection of wipes – linear wipes, clock wipes, zig-zags, barndoors, and all sorts of them. It pops up this big, empty window for some reason. Resize it and move it so you can switch between scenes and preview the transitions.
- The “Softness” number effects how hard or soft the edges of the shapes are. Play with this to your liking. You can also invert the shapes of the transitions to do the reverse. Click “OK” when you are done.
- Lastly, we have The Stinger. A Stinger transition is basically a video clip or animation that fills the screen briefly while scenes transition, and then pulls off of the screen. This is key for high-quality production value for broadcasts, and can even be seen in some cartoons.
You can make these yourself using most higher-level video editors by rendering them as a MOV or uncompressed AVI with the Alpha transparency layer included. You can also find plenty of basic free ones online with a few easy Google searches – or get higher quality royalty free ones from a marketplace like VideoBlocks.
I’ll include a couple basic ones linked in the video description. I cannot share all the ones I use, since some of them are from VideoBlocks or directly from creators, and so on – but I can share a couple.
DOWNLOAD SAMPLE TRANSITIONS:
- https://drive.google.com/file/d/0BybRZiYClxJEb2RoMjY4RkFnN2c/view?usp=sharing
- Backup Mirror: https://mega.nz/#!SMgC3CiC!hd-miaZq5UsNkHWBEeAf-2U5JDnEL1KWxdWxrSaPKz8
Chapter 7 – Secrets & Tricks
32 – 5 Tips for Optimizing your Video Settings for Performance
- Lower frame rate (30 instead of 60, 25 instead of 30)
- Lower resolution (low bitrate, smooth 480p looks better than 720p and choppy)
- Make sure your resolution scaling is consistent
- Change CPU Usage Preset for X264
- Use Hardware Encoding
33 – Graphics & Visual Templates
- Get Paint.NET (free Photoshop alternative) – https://www.getpaint.net/
- GIMP – https://www.gimp.org/
- Recommended Graphics Designer – https://twitter.com/quinnmdesigns
Using graphics in OBS Studio is super easy. They can be added via an “Image” source. They generally should be a PNG file for the best quality and to maintain transparency for overlays.
You can make the graphics yourself using a program like GIMP, Paint.Net, or Photoshop – or anything really – and import them. Or, you can hire out! There are lots of aspiring graphics artists that are willing to create stream graphics for cheap or free to get their name out there.
NerdOrDie Twitch Panel Generator – https://nerdordie.com/resources/free-resources/customizable-twitch-panels/
34 – Chroma Keying
Amazon Affiliate links:
- Elgato Green Screen – http://geni.us/O7wiFg9
- Cheap Green Screen Kit – http://geni.us/ADkLg8
- Cheap Backdrop Stand – http://geni.us/cqG6rGy
- Impact Collapsible Green Screen – http://geni.us/NPvKp
- Great affordable LED light kit – http://geni.us/8AQ66v
35 – Virtual Background Removal
Amazon affiliate links:
- Intel RealSense Cameras:
- SR300 Dev Kit – http://geni.us/Vdrj
- Creative BlasterX Senz3D – http://geni.us/4eZTT
- Razer Stargazer – http://geni.us/pyH8Afn
- Logitech C922 – http://geni.us/k8qYtw
- Driver & Software Downloads – http://support.logitech.com/en_us/product/c922-pro-stream-webcam/downloads
- Personify ChromaCam – http://geni.us/0nuTYI
- TriDef SmartCam – http://geni.us/JLB6
36 – Multi-Monitor Streaming
- Automatic Scene Switcher Plugin: https://obsproject.com/forum/resources/automatic-scene-switching.395/
- Taran’s tutorial on the Auto Scene Switcher: https://www.youtube.com/watch?v=ufOFe1EGCHg
37 – Ultrawide & Oddball Resolutions
- 21:9 Gaming – https://www.youtube.com/channel/UC0sEn4T2Kl551QQe1miZg7g
- The Explorographer – https://www.youtube.com/user/ADWheelerPhoto2012
- Explorographer Website – https://www.theexplorographer.com/
- Photography & Mentoring: http://TheCreatours.com
38 – Separate Webcam & Gameplay Recording
- Webcam Reviews Playlist – https://www.youtube.com/playlist?list=PLzo7l8HTJNK-CGvkUG674cKwWP-IlNf0B
First of all, consider what you want to record. Gameplay? Webcam? Two webcams? Two screens? What are the resolutions?
This works best if your two sources are the same resolution – ideally 1080p or lower. For example, a console gameplay capture card at 1080p and a webcam at 1080p. Or multiple webcams at 1080p – this is how I’ve done a lot of my webcam comparisons.
Don’t worry much about framerates – you’ll just use the highest of your sources, presumably 60FPS, though 30FPS will be easier for your computer to handle.
You’ll wanna make a new profile for this, BUT, make a new profile and we’re going to customize the resolution. This is the kicker, but also what makes this so cool and easy. Simply set the resolution to fit all of your desired sources. So if you want 1080p gameplay and a full 1080p webcam, set the resolution to 1920 times 2 wide, and 1080 high – or 3840 by 1080. If your sources are 720p, do 2560×720. Or if you’re doing 3 or 4 sources at once, go for a full scene. My 3 1080p webcam comparison video was on a full UHD canvas of 3840 by 2160. 3 or 4 720p sources would need a canvas of 2560 by 1440.
39 – LUTs
- Free LUTs – https://generator.iwltbap.com/
- Sample LUT – https://drive.google.com/open?id=0BybRZiYClxJEc05ja3BlTUwtX2s
40 – Circular Webcams & Masking
- Get Paint.NET (free Photoshop alternative) – https://www.getpaint.net/
- Sample Mask PNGs – https://drive.google.com/open?id=0BybRZiYClxJETDhoS2VHZUJFbnM
- Webcam Reviews Playlist – https://www.youtube.com/playlist?list=PLzo7l8HTJNK-CGvkUG674cKwWP-IlNf0B
41 – Video Filters
- Under “Audio/Video Filters” if you click the plus, you have “Video Delay (Async).” This lets you add a delay, measured in milliseconds, to your video source to better align it with your audio inputs. This is useful if you have an out-of-sync USB device.
Under “Effect Filters” you get quite a few neat options.
- There are tools for Chroma Keying and Color Keying.
- The “Scroll” effect keeps scrolling and looping your source with speed parameters, as well as height and width limiting options. This is kinda neat. Can be used for a text scroll like in a news segment layout.
- “Color Correction” allows you to do some basic color work for your video source – gamma, contrast, brightness, saturation, hue shift, opacity, and a color picker. But if you’re messing with a webcam, you should absolutely do as much of this as possible from within your actual webcam settings dialog – or at least set your webcam to manual so it doesn’t keep trashing these settings with auto adjustments.
- The “Crop/Pad” filter lets you crop your source. It also lets you “pad” it by giving additional transparent pixels within the bounding box around your source. It’s easier to crop a source by holding alt when dragging the bounding box, though.
- “Image Mask/Blend” allows you to apply a cool mask or texture to a source.
- “Render delay” is another option for delaying your video. This can help reduce system load with running video files as sources.
- “Scaling/Aspect Ratio” can be used to fix a lot of issues there. Some video devices will let you set a custom resolution, but may not change to the proper aspect ratio within OBS. I.e. setting a webcam to 1280×720 but it squishes that into a 4:3 block. This helps you scale things better, and can help with distortion when scaling ultrawide monitors.
- “Sharpen” applies a basic sharpening filter to your video source. Use this lightly – too much can make your video look funky. Also, the sharper a video is, the harder it is to compress. Keep that in mind.
42 – Best Possible Settings
Learning the ins and outs of OBS Studio can be nice, but sometimes you just want to jump ahead to the best possible settings. This is the video for that. I’m going to skip over creating scenes and sources and all that, let’s tackle setting the right bit rates and settings for a high quality live stream or video recording!
43 – 32-bit VS 64-bit
TL;DW – Use 64-bit unless you have compatibility issues w/ devices or plugins.
- Techquickie – 32-bit vs 64-bit – https://www.youtube.com/watch?v=IknbgnJLSRY
44 – OBS Studio VS Nvidia Shadowplay / GeForce Experience Share
In this episode, we discuss the differences between OBS Studio and Nvidia Shadowplay (or GeForce Experience Share) and why you might want to use one or the other.
45 – Instant Replay & DVR
- Steggy’s Instant Replay tutorial & Elgato Transition: https://www.youtube.com/watch?v=l1UFXIi2_kI
- Sample Instant Replay overlay: https://drive.google.com/open?id=0BybRZiYClxJENzVZbzRRSFlOTFE
46 – Stream a Console with OBS without a Capture Card
Here’s how we did it for my buddy:
He set up his YouTube channel connected to his PS4 and set the stream to unlisted. Start streaming, and gets the link of the stream page.
Then over on the PC, he pulls up the stream page in a browser window. You want this to be its own window, not just a tab – that way Window Capture can keep hooked in if you need to do other stuff on the PC.
We set up window capture, turned off his computer speakers so it doesn’t echo the stream throughout the room, and added the StreamLabs overlays.
OBS Master Class UPDATE: New Recommendations
Conclusion
Thank you so much for watching my OBS Studio educational course. A ridiculous amount of time, work, and terabytes of video file storage went into making this happen, but I truly believe this to be the best resource available today for those wanting to get started with OBS or improve their streaming setups with the software.
Please check out our sponsor, Elgato Gaming (Cam Link, Stream Deck), or consider utilizing one of our affiliate links, such as for ReStream or GOG.com to help support the work I do here. Hit the like button and share this with a friend, subscribe to the channel, and so on. I’m EposVox, here to make tech easier and more fun, and see you next time. Happy Streaming!
PATREON: http://patreon.com/eposvox