
Want to spice up your live streams with some sick overlays, customized alert themes, unique sound effects, or cool video stinger transitions? Today I walk you through the complete setup process using Nerd or Die’s streaming packages with OBS Studio.
OBS Setup
If you already have existing OBS settings and scenes added, it may be wise to add a new Profile and Scene Collection so that you can go back to what you have before with no issues. This is also useful in the future if you want to test different things without ruining your live profile. Go to the Profile menu, select New and give it a name. Then do the same in Scene Collection and you’re good to go.
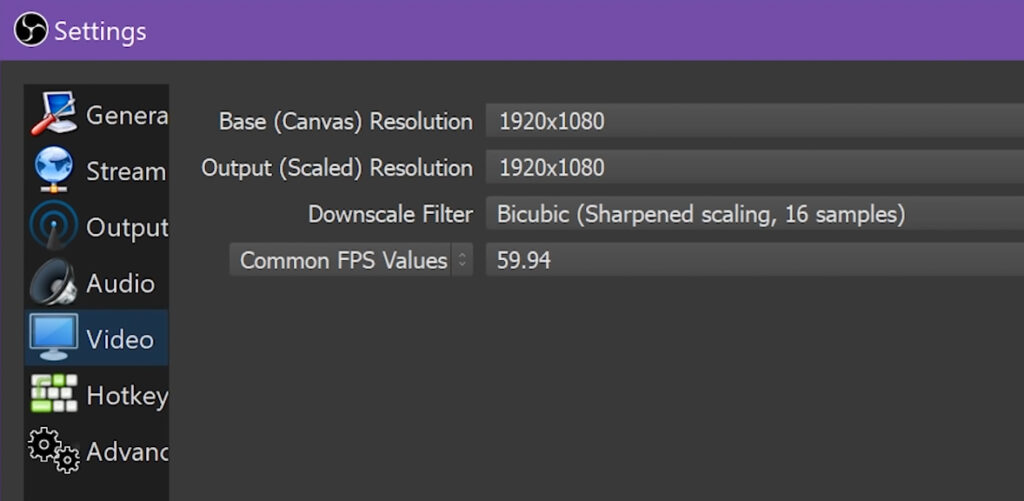
Now go to settings and open the Video tab. Choose what resolution you want your Canvas resolution and Scaled resolution to be. The Canvas resolution is typically the same resolution as whatever you are capturing (1080p for a 1080p monitor, 1440p for a 1440p monitor, etc.) while the Scaled resolution is what the output resolution that is recorded or sent to your streaming service will be. That being said, there is a setting in Output to rescale the output but that puts more load on the encoder while the Video setting puts it on your GPU itself making that the better option for performance. For a Downscale filter, typically Bicubic is recommended and for framerate, you will more than likely want 60.
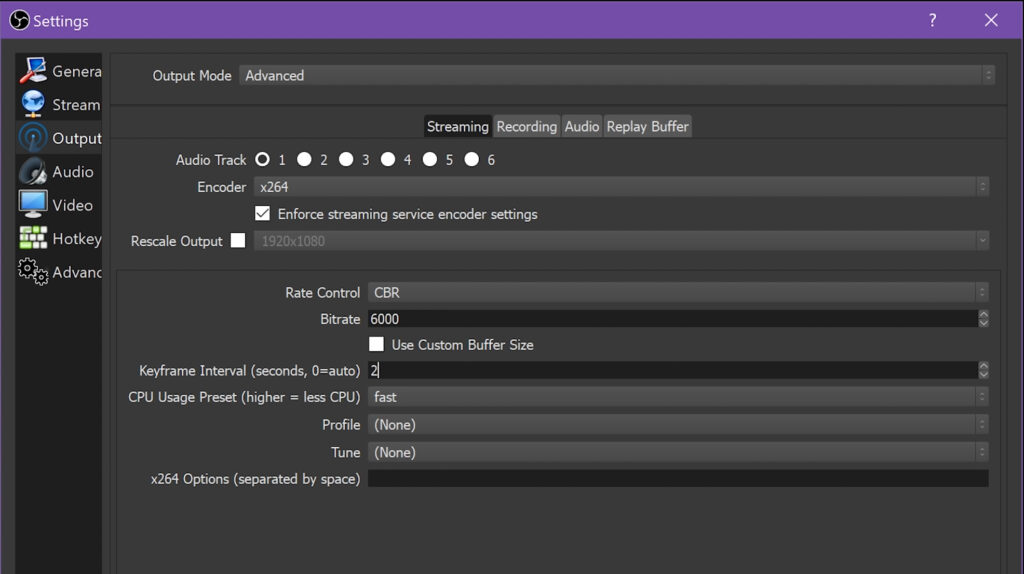
Moving forward to the Output tab, there are two options for Output Mode, Simple and Advanced. This tutorial will focus on the Advanced mode. Your first option is which encoder you want to use. For more information about choosing an encoder, refer to this video.
For this example, x264 is chosen. For Rate Control, choose CBR and set a Bitrate of 5840. Twitch has a maximum bitrate of 6000 which allows for 5840 for video and 160 for audio which will be set up later. For Keyframe Interval, set a value of 2 and choose your Preset. For x264, the slower the option you choose, the higher quality you will get but the more processing power will be used by the encoder.
If you use x264 encoding, you might want to do some testing with the different Presets to find which one provides the best quality without harming performance. Profile, Tune, and x264 Options can all be left blank or (None).
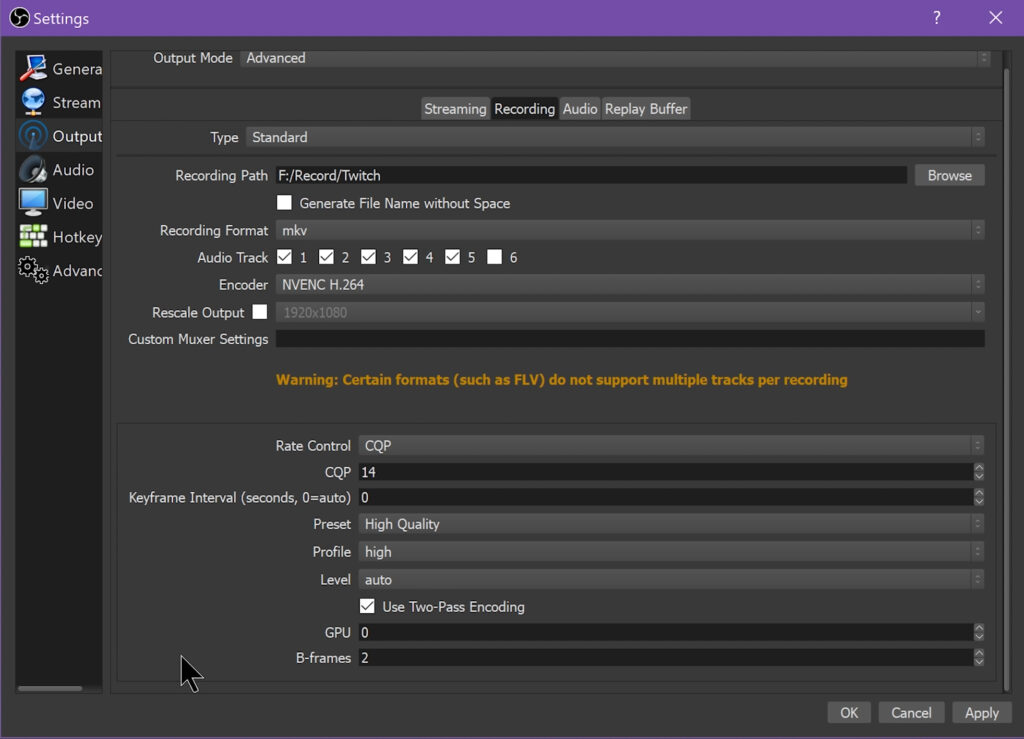
Recording is where you can start to mess with settings more to get as high of quality video that you want to. You are only limited by the speed and size of the drives in your computer.
Choose a Recording Path for all of your recordings to be saved to that will support your recording settings. Under Recording Format, it is recommended to use .MKV, since it will not corrupt, should something happen during recording like .MP4 will. The same options are here as in Streaming for Encoder including using the same settings with (Use Stream Encoder).
In this example, NVENC will be used for the recording instead. For recording, Rate Control can be set to CQP with a value of 14 which will provide an essentially visually lossless recording. Set Preset to High Quality and profile to High and you are good to go.
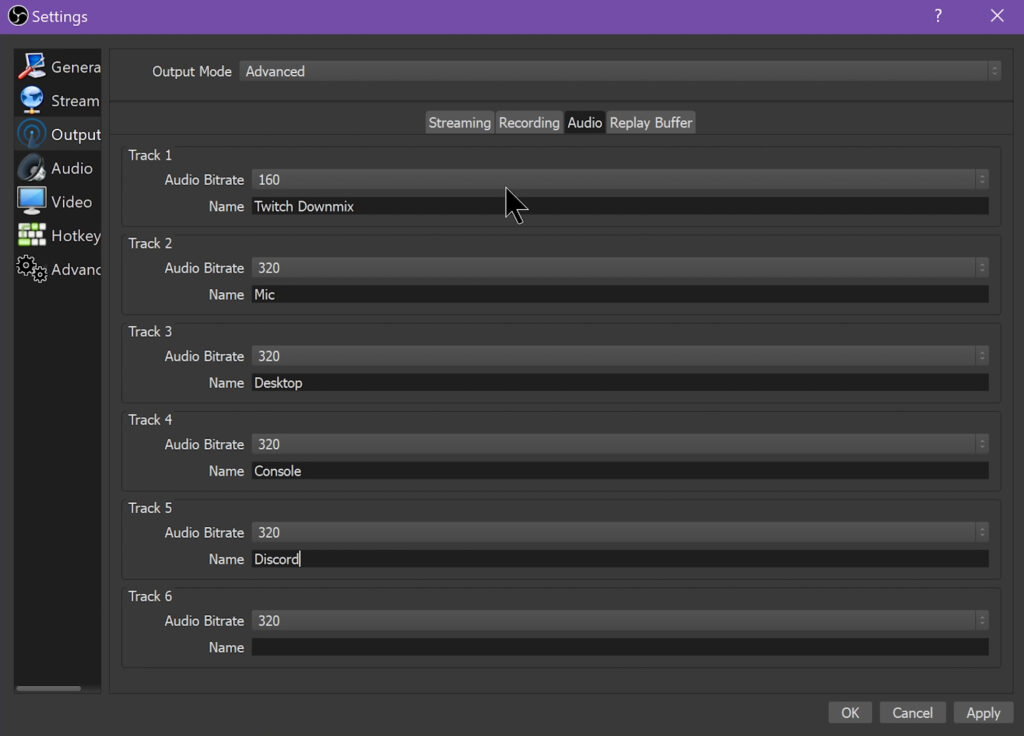
Audio settings are much simpler. For Track 1, leave the Bitrate at 160 and name it something so that you know Track 1 will be sent to your streaming service.
For Track 2 through 6, set the bitrate to the max of 320 and name them whatever device you plan to have sent to that track.
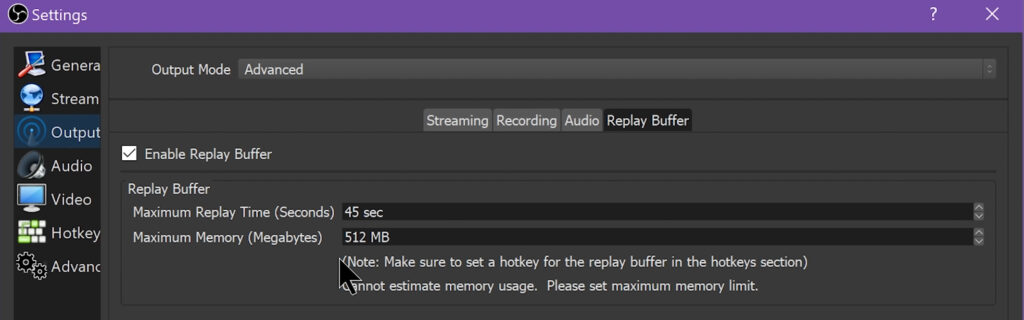
Under Replay Buffer, you can set it to save as long of a replay as you wish. If you do set up a Replay Buffer, make sure to go into Hotkeys and set a key to Save the replay.
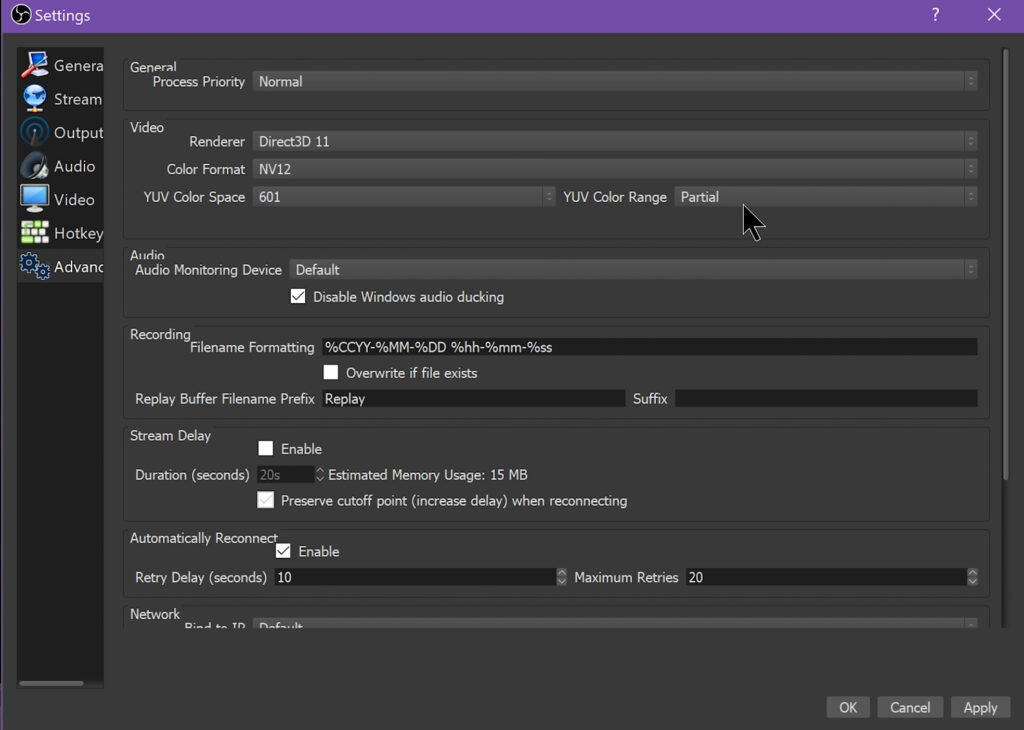
Lastly, under Advanced, make sure you have Color Format set to NV12, Color Space set to 709 and Color Range set to Partial.
Now you can start setting up your Scenes and Sources. Add whatever scenes you plan to have available during your stream.
Nerd or Die Kits
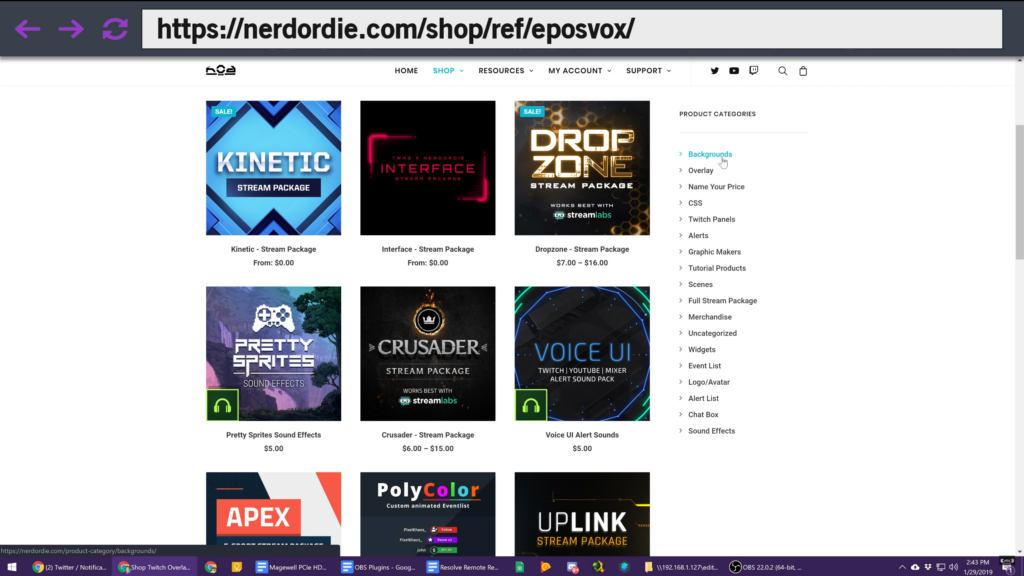
Nerd or Die has a lot of premade packages for a lot of the elements that streamers look for to add to their stream. This includes Backgrounds, Overlays, Twitch Panels, Alerts, and much more. They have a lot of free resources but most of the packages are reasonably priced and come with unified aesthetics to create a clean streaming layout.
You can even mix and match from multiple packages if you like one part from one package and a couple parts of another as long as you take the time to make them match if you want it to look more professional. Most packages also include customizable items with Photoshop files that will let you add, for example, your username in the same style as the rest of your layout.
Using Nerd or Die Packages
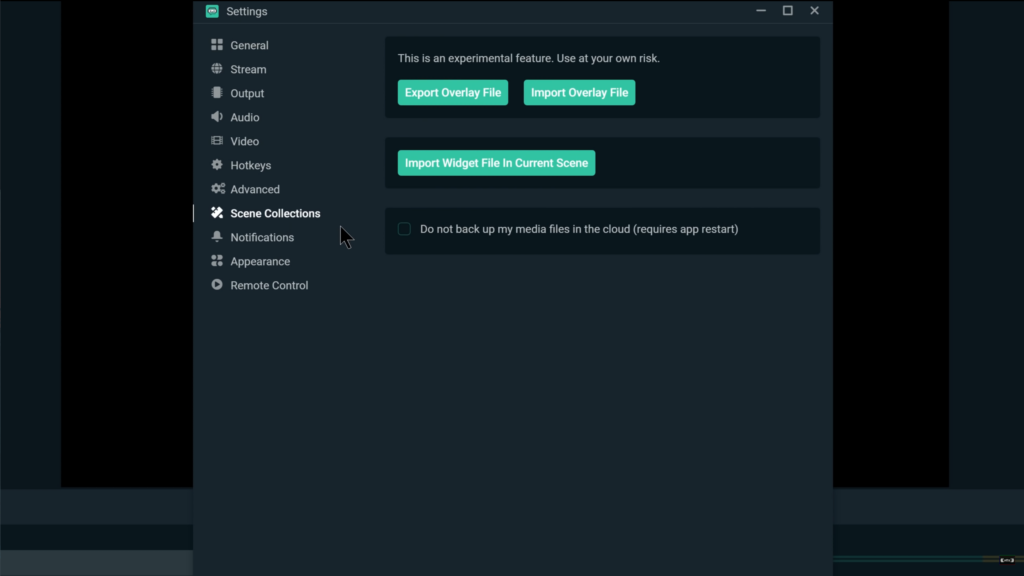
If you use Streamlabs OBS, many of Nerd or Die’s packages include SLOBS OVerlay Files that make importing the package super simple. All you have to do is go to Settings and Scene Collections, click on Import Overlay File and find the Overlay file from Nerd or Die. This will add everything that is included in the package to SLOBS without you having to go in and add every piece by hand.
For OBS users, you will have to add each item on it’s own into whichever scene you wish to add it to.
OR, since the posting of this video, Nerd or Die has released “one-click setup” packages that you can use following their instructions. We’re still going to walk through how to manually configure everything in this post, as this is the point of what we’re explaining, but you do have that option now with Nerd or Die.
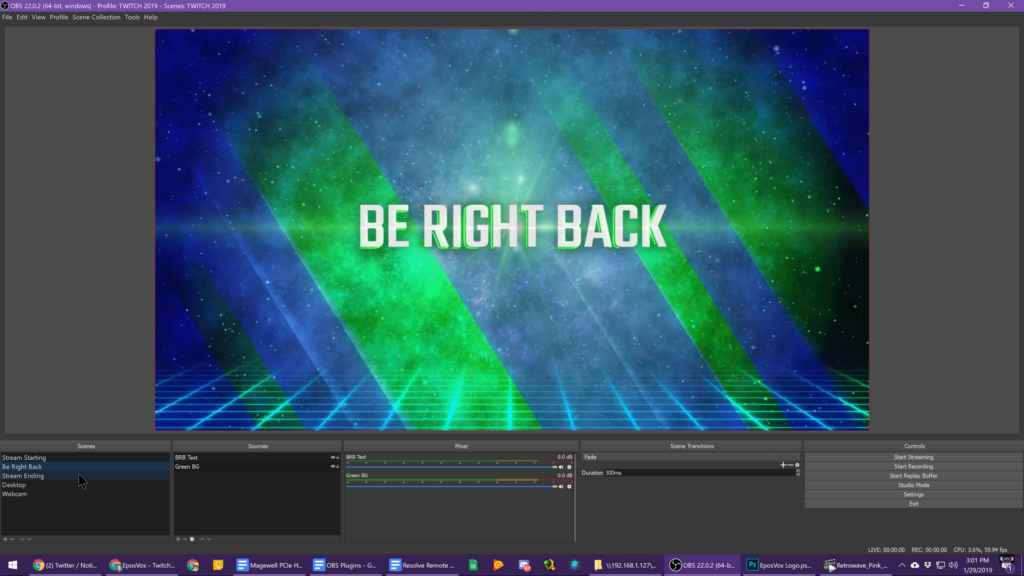
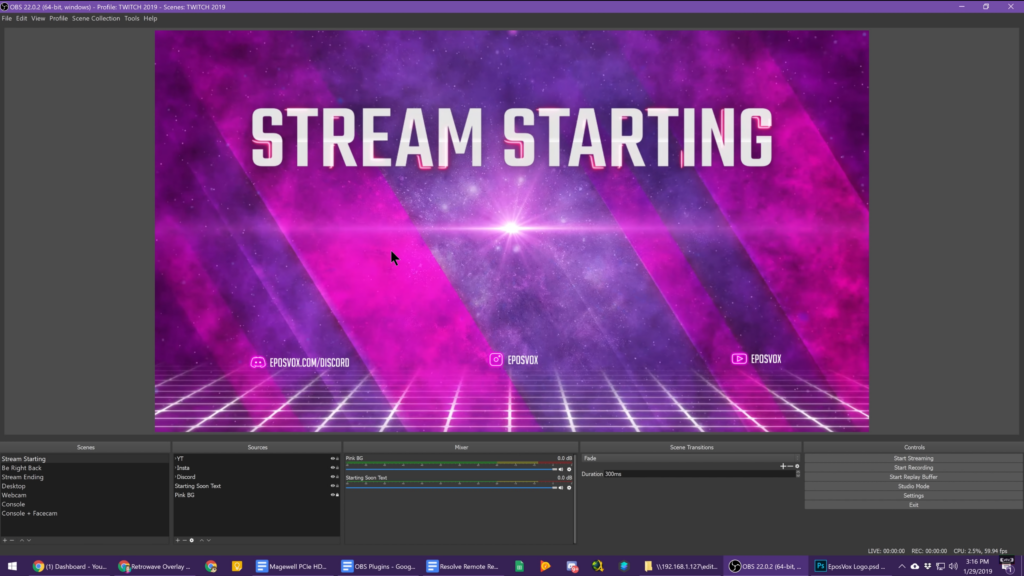
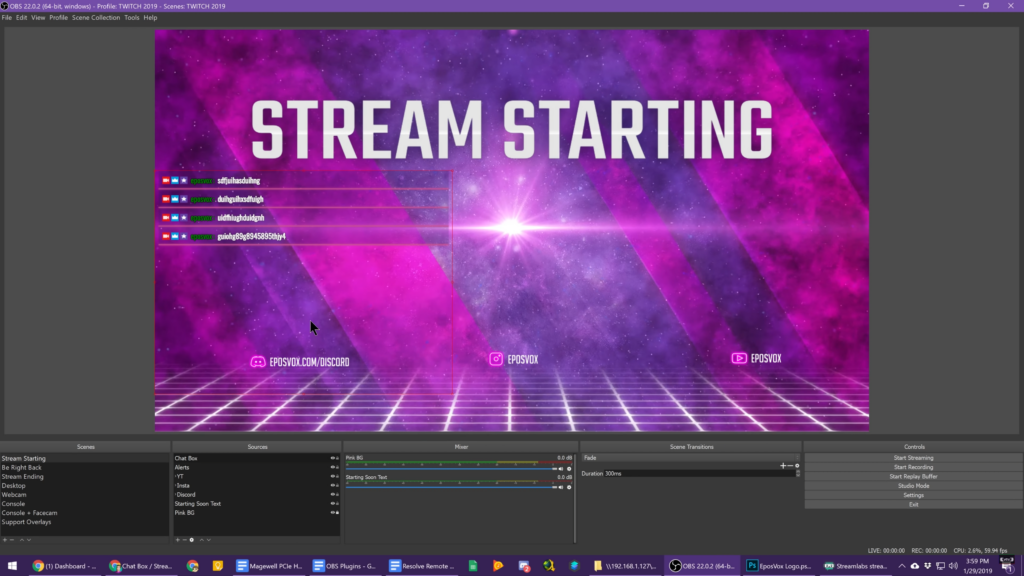
Status Slides
Streams should have three universal scenes that will help your production value. That is a Starting Soon, a Be Right Back, and a Stream Ending screen. For static images, go to Add Source and select Add Image and browse for the file that you want to add. For video or motion files, select Add Media Source and choose the file.
If there is a file that will be used multiple times such as a background for these scenes, you only have to add it once and then you can add the same source to a different scene by choosing “Add an Existing Source” in the Add Source dialog.
Webcam Frames
If you use a webcam and you want to make it look a lot better and more professional, you can add a frame around your webcam. Many Nerd or Die packages (as well as other resources) include webcam frames and there are even more that are just the webcam frames.
Usually, there will be versions for both 16:9 and 4:3 aspect ratios. Most current webcams and alternatives will provide you with a 16:9 source but you can crop that down into 4:3 if you want to cut off, for example, a dirty living room or if you have a green screen that is not large enough for the entirety of your webcam. Once you know which size you want, add it in as an Image source and align it with your webcam.
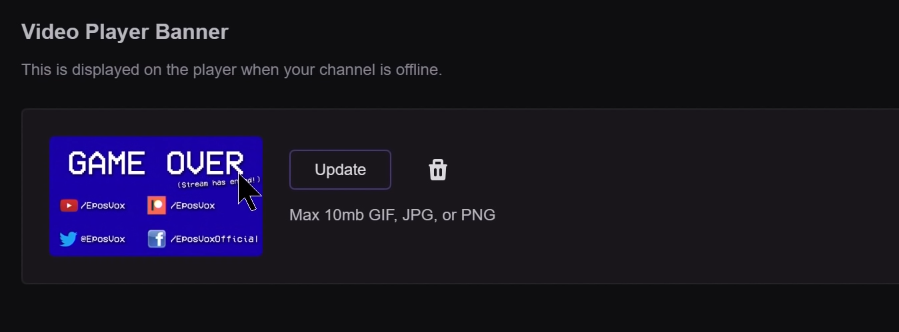
Offline Images
Offline images are what Twitch will show on your live page while you are offline. Usually this will have your username, something noting that you are offline (like the word “Offline” or “Game Over”) and some other places that people can find you such as Twitter, YouTube, a personal website, etc. All you have to do to set this up is to go to your Twitch dashboard, go to settings, and scroll down to Video Player Banner. Then click upload and select your file and you are all set.
Social Media Overlays
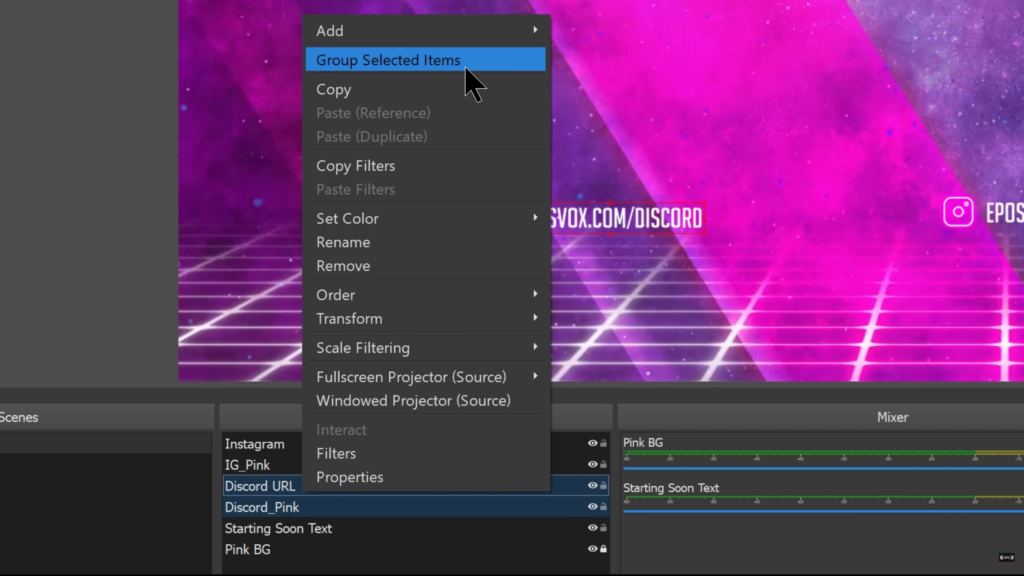
For your Starting, Be Right Back, and Ending screens, you may want to include links to your social media accounts or other places viewers can interact with you at. You can add the logos for those sites as Image Sources then add a Text Source with the link to direct viewers on where to go.
If you have two sources that are going to be together no matter where they go, you can group them together so they will move together by right-clicking one of them and choosing “Group Selected Items” and naming it something along the lines of ”Source 1 + Source 2.”
Overlay Setup
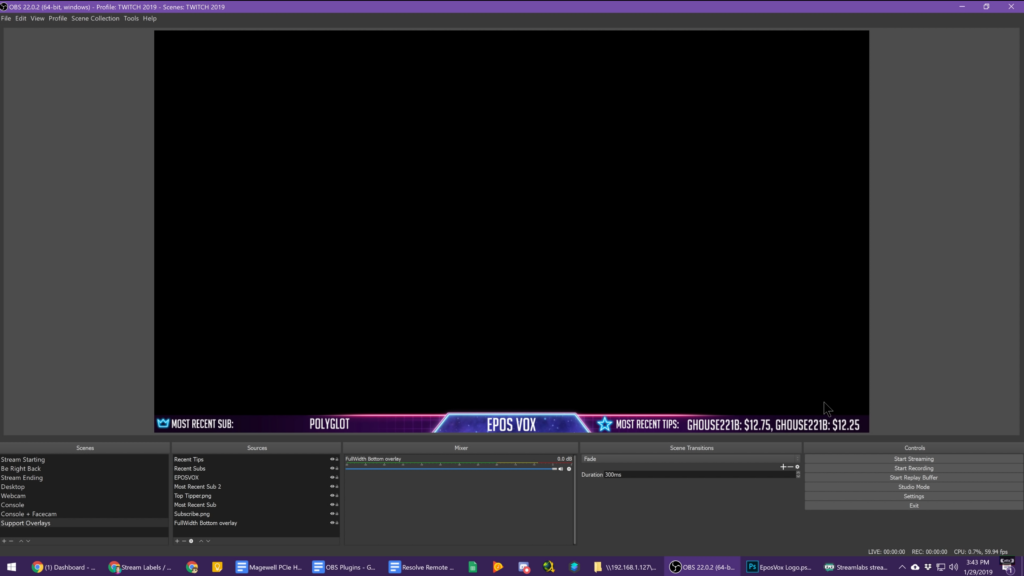
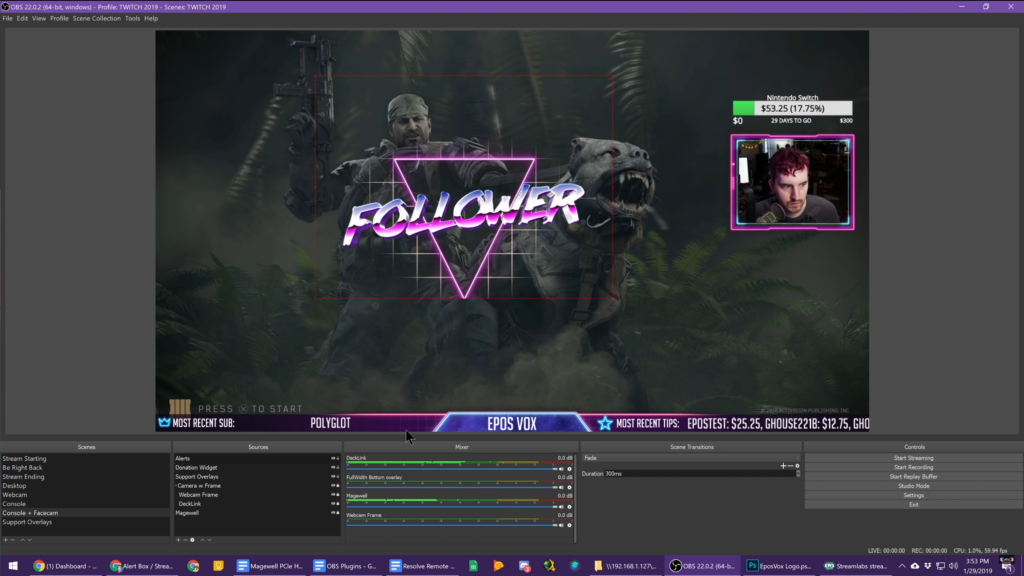
Moving on to the in-game overlay, you might want to show off some of your most recent viewer interactions such as follows, tips, or cheers, or any other information you want on screen while you are gaming. Again, if your Nerd or Die package includes something for this, then add it as an image source and place it where you want in your layout.
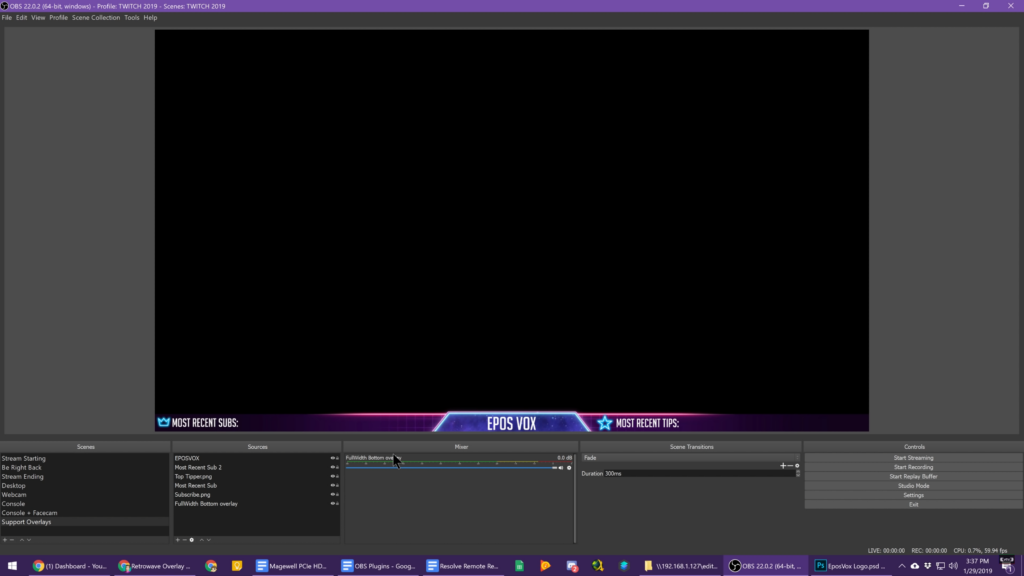
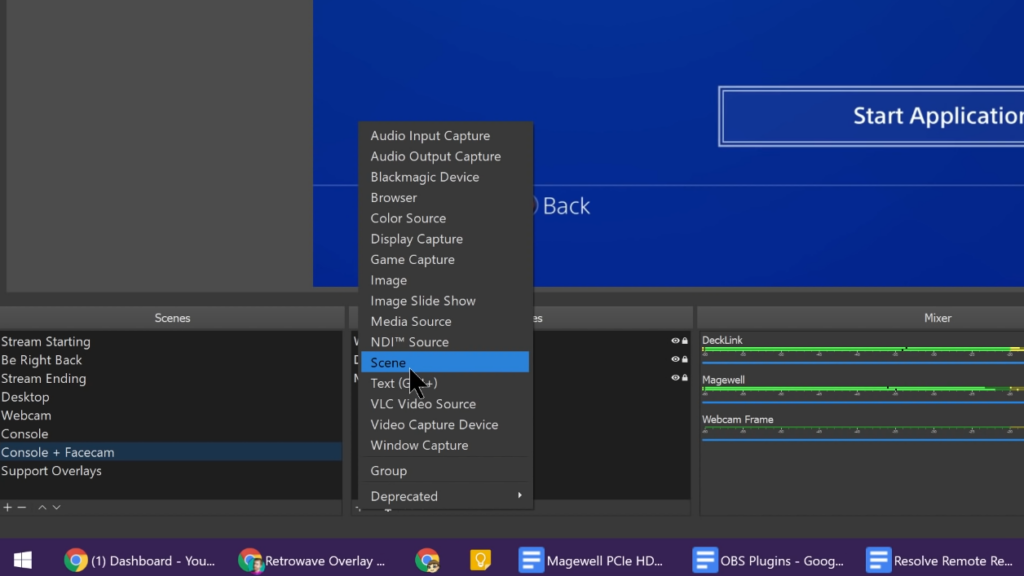
This is an example of something you may want to set up Scene Nesting for. To nest a scene, create a new scene and name it something obvious like, in this case, Overlay, and add the overlay to that instead of to your gaming scene. Then go to your gaming scene and add a Scene Source and choose the Overlay scene. By doing it this way, you can add the Overlay scene to multiple different scenes without having to adjust it on a scene-by-scene basis and instead change it in the Overlay scene which will affect it in all of the nested instances.
Stream Labels Setup
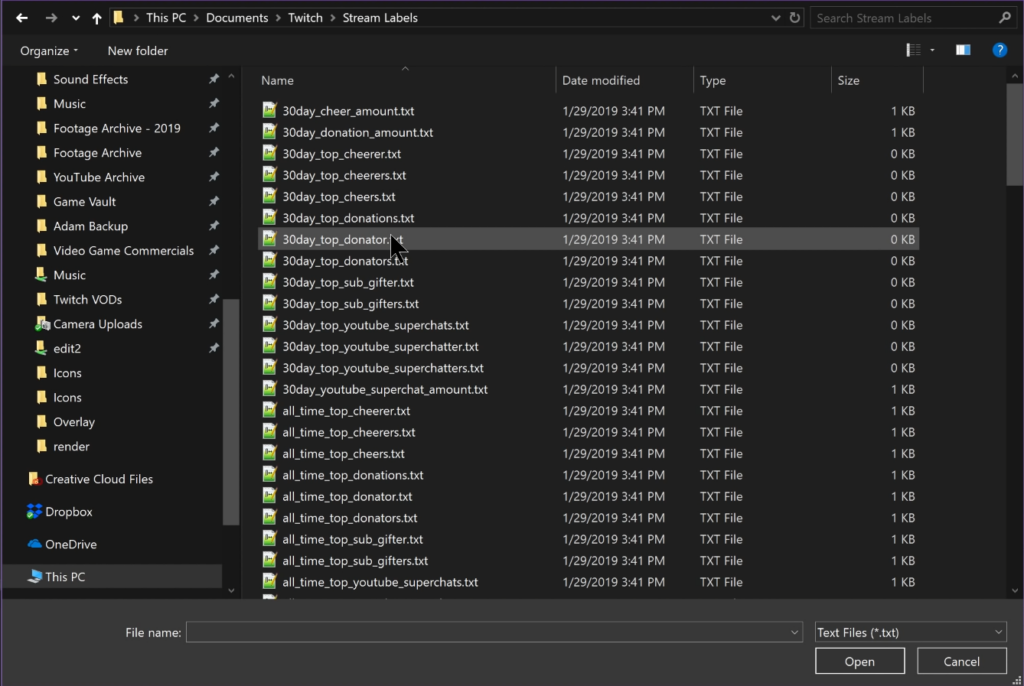
Stream Labels are provided by Streamlabs, though there are other places that you can get them through, that will add text files about your stream such as Recent Subscriber, Top Tip, Recent Cheer, etc. that you can then add to OBS as a Text Source with the “Read From File” option checked. With this, it will automatically update any time the information changes so that you don’t have to keep up with that information yourself.
Widget & Alerts Setup
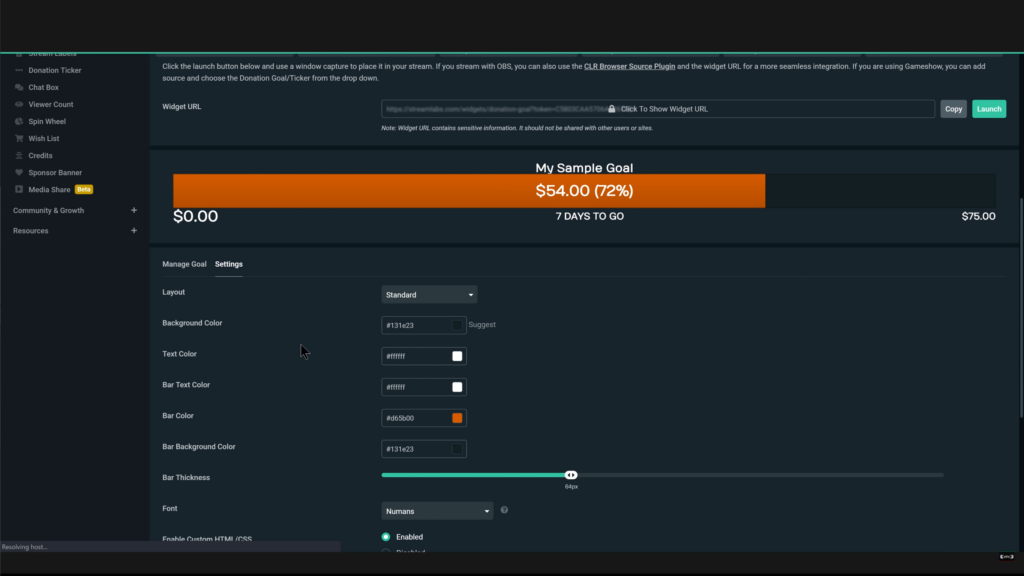
If you have a goal that you are trying to reach such as subscriber count or an amount of tips so you can purchase something new for the stream, you can set up a goal widget so that you and your viewers can see live how close you are getting.
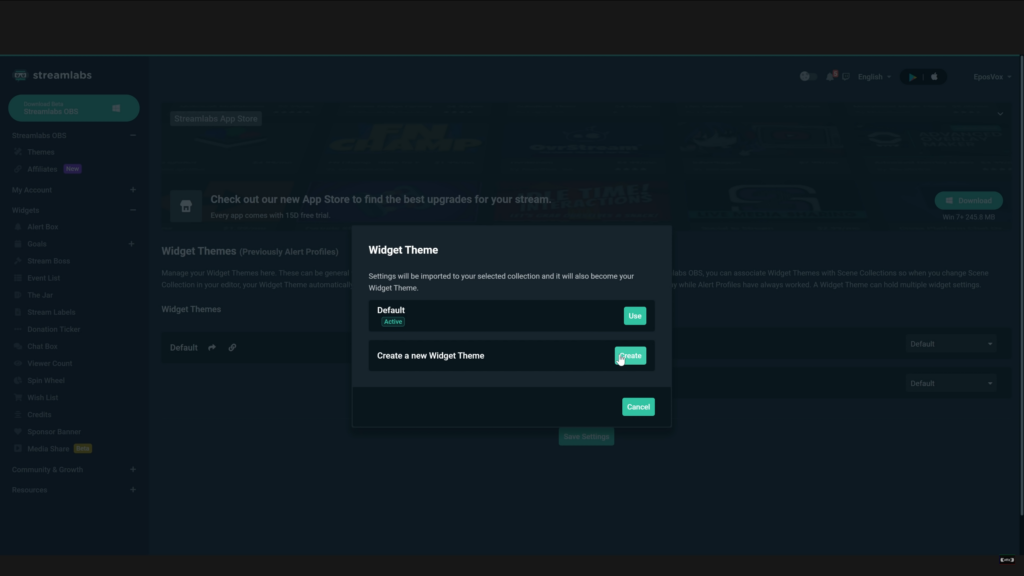
If you are using Nerd or Die packages, you might have received a Widget theme that matches the rest of the package. To use this, open the Internet Shortcut file for the widget you want to add and it will open up the Streamlabs site where you can create a theme and name it something along the lines of the package you are using.
Then you can change the settings for that widget to customize it for your needs and save the changes. Then copy the widget link at the top of the page and add it to OBS with a Browser Source. This would also be how you set up alerts so that when someone interacts with your stream, there is a popup on-screen so that they can be recognized.
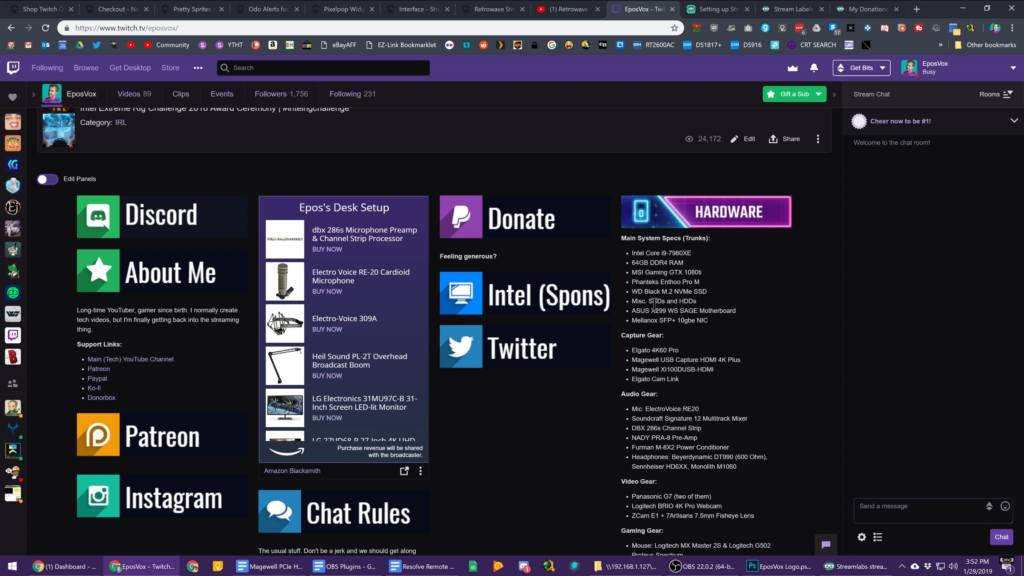
Twitch Panels
Twitch Panels are images that sit at the bottom of your live page that help you separate out information that you want your viewers to know about. These can be social media links, an “About Me” section, a list of the gear you use, or just chat rules. They don’t have to be anything fancy but your package may include these to help you unify your stream aesthetic.
Chat Box
Depending on what you will be streaming, you may want to have a live chat box on screen so that people can see their messages pop up on stream. Streamlabs has another link that you can add to OBS as a browser source and some packages will include a theme to change the text and appearance of the box. This is something that you will have to decide if you want it or if it makes sense for your stream.
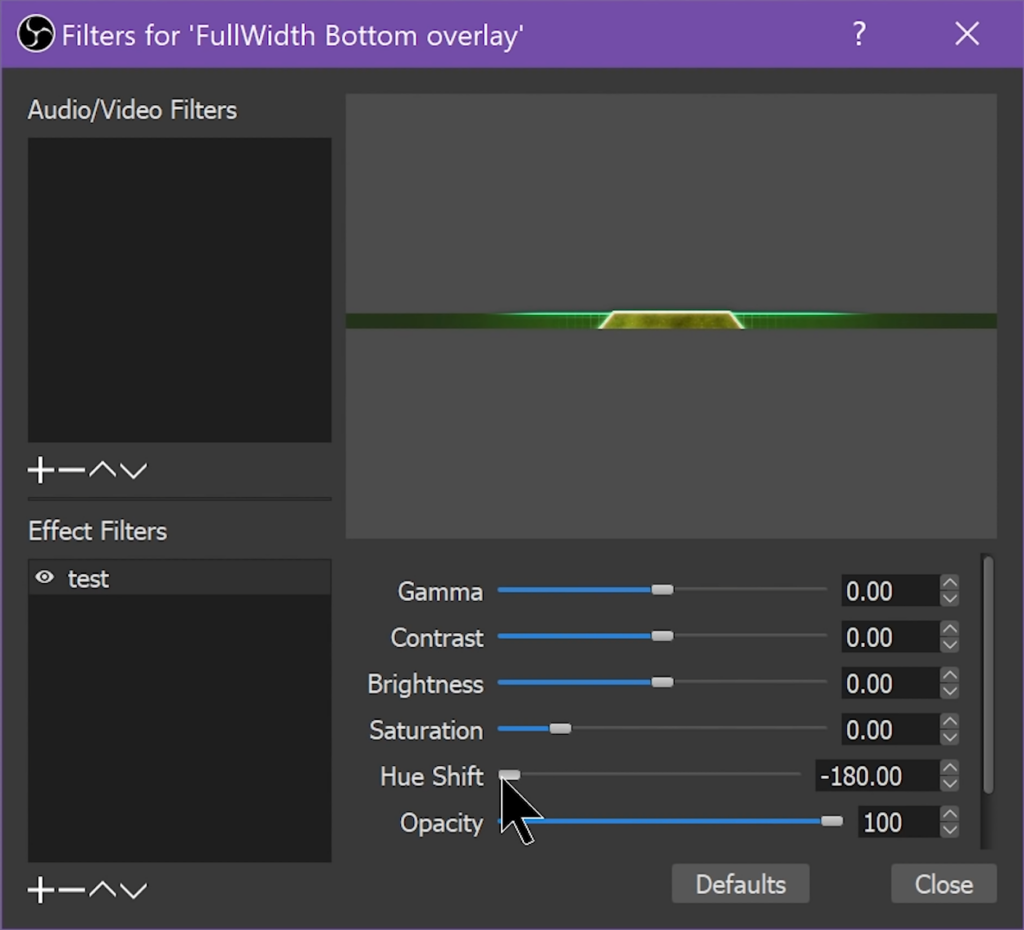
Color Customization
If you have anything that you wish could be a different color, you can apply a filter in OBS that will adjust the color of any source. Right click on the source that you want to adjust and click on Filters. In the bottom left, click on the plus and add a Color Correction filter to see the options you have.
With this, you can adjust a lot of the color settings to change how the source looks. If you want to apply the same filter to multiple sources, you can right-click the source you have the filter on, choose Copy Filters then move to the other source and choose Paste Filters.
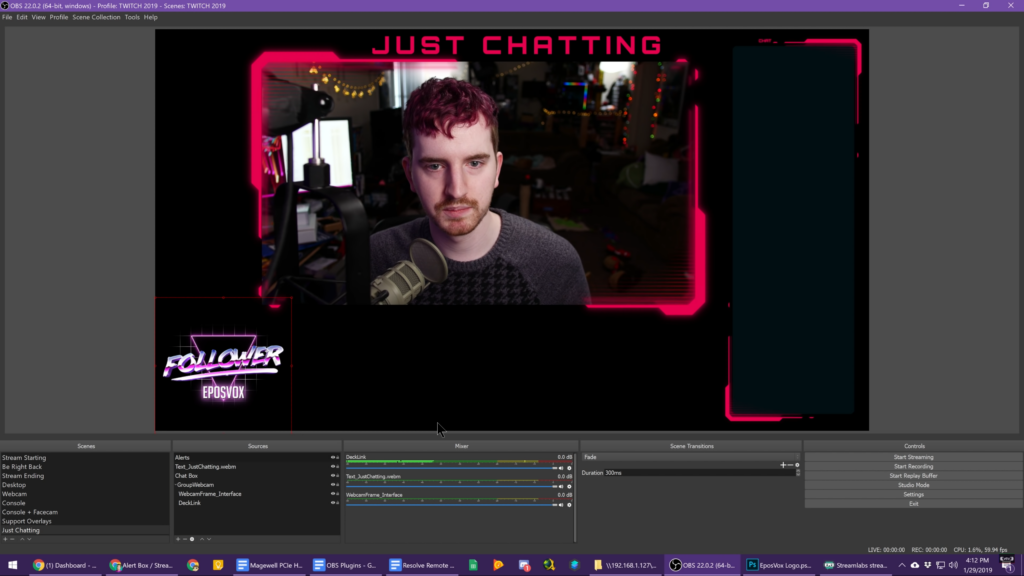
Just Chatting Layout
If you want to have a screen where you can relax more and just sit there and talk to your chat, you might want to add a Just Chatting scene where your webcam is bigger and you don’t have a game or some other source filling up most of the screen. Setting this up is much the same with adding all of the sources you want to show and arranging them in a way that makes sense.
Stinger Transitions
Stinger Transitions are video files that play on top of changing scenes in OBS to hide the transition between them. Different packages will come with a transition that will match the theme of the package in some way.
To add a transition, find the Stinger Transitions dock in OBS and click on the plus to add a new one and click on Stinger and browse for your file. Then you can adjust a couple of the settings such as where the actual transition takes place so that you can make sure the change is hidden or how the audio plays.
If you want to get crazy with the transitions, you can download the OBS Transitions Matrix plugin that will let you choose what transition file to use based on which scene you are changing from or to.