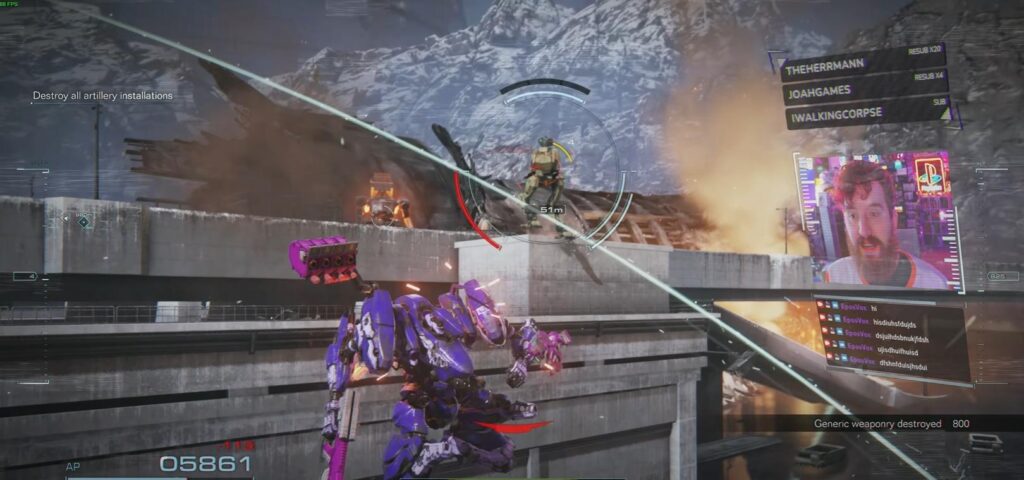
Armored Core VI just released and Shindigs showed off this sick HUD effect they made with their VTuber avatar for their stream:
621, your next assignment comes from the OBS Corporation. They want you to recreate this mech pilot overlay for free. All assets must be procured on the battlefield. I'll walk you through it. https://t.co/IRcay6JEXt
— shindigs (@shindags) August 28, 2023
So naturally, i took up the challenge and figured out how to do it AND take it to the next level.
Requirements
- OBS Shaderfilter Plugin (updated port by Exeldro)
- OBS Source Clone Plugin (Exeldro)
- OBS FreeFX Plugin (free fork of StreamFX by XoXFaby)
- My RGB Visibility Shader & AC6 Layout Graphics
Result
Initial Setup
First, add your camera source (or scene) and crop it to 4:3. Position it about where you want it to go in the HUD.
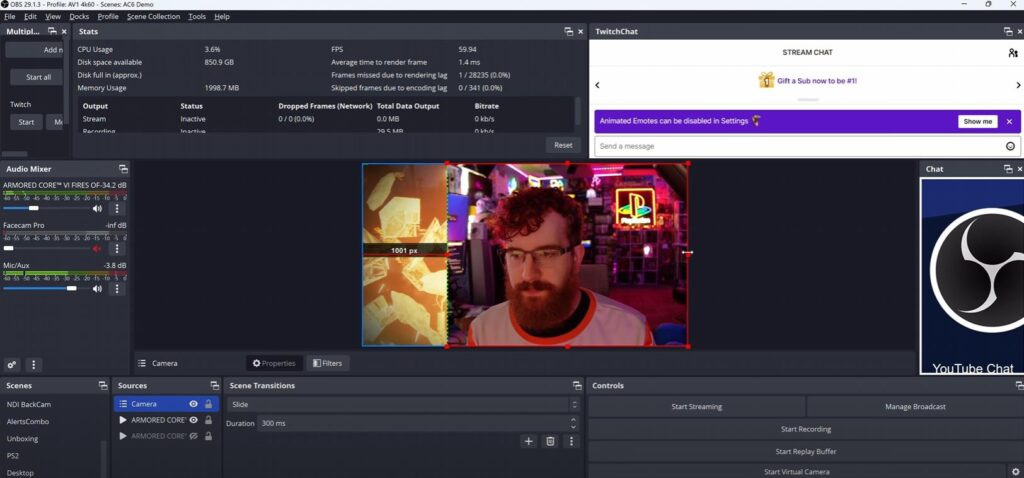
Next, add the layout’s webcam PNG overlay and position the webcam within it.
Copy the webcam and overlay layers into a new scene (just call it “Webcam Overlay”) and add that scene as a source back to your game scene. Delete or hide the original sources. Make sure the webcam layer is below the overlay layer in the nested scene.
Repeat these steps for your chat box and event list (I just used the default StreamElements widgets as browser sources for this), nesting each in their own scenes with the overlays.
3D Projection
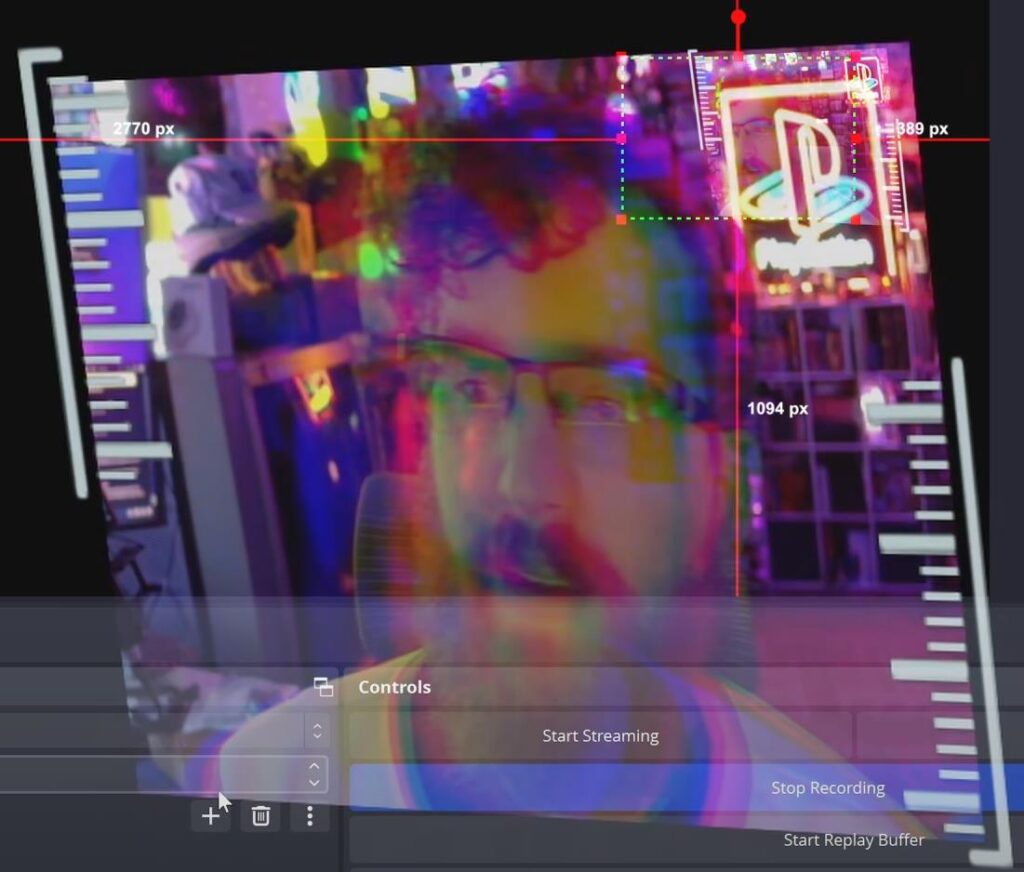
Now add a filter to the Webcam nested scene and choose “3D Transform” (this is provided by the FreeFX/StreamFX plugin). Use the Corner Pin mode to angle your webcam as if it was wrapping around the cockpit window in front of a mech pilot.
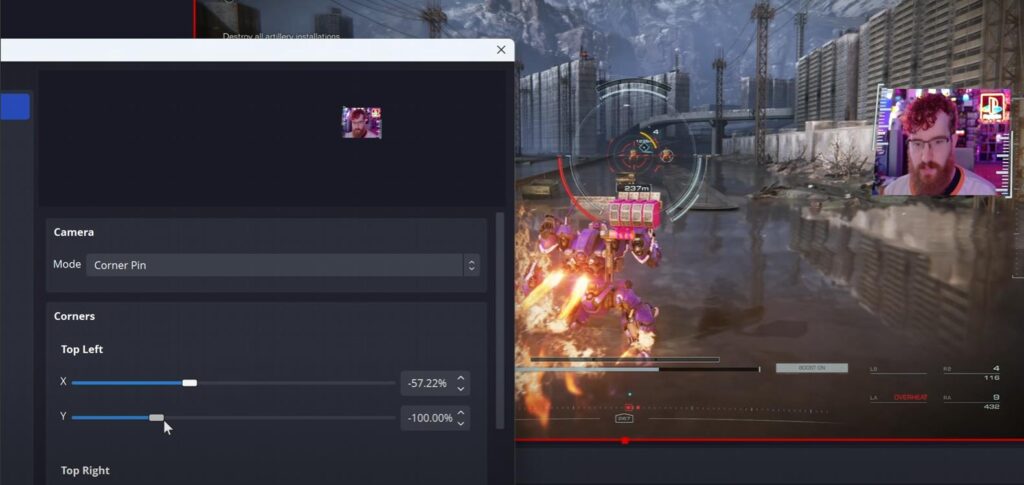
Feel free to adjust positioning and sizing, as well to fit your desired look.
(Again, do this for your chat and event list widgets, too.)
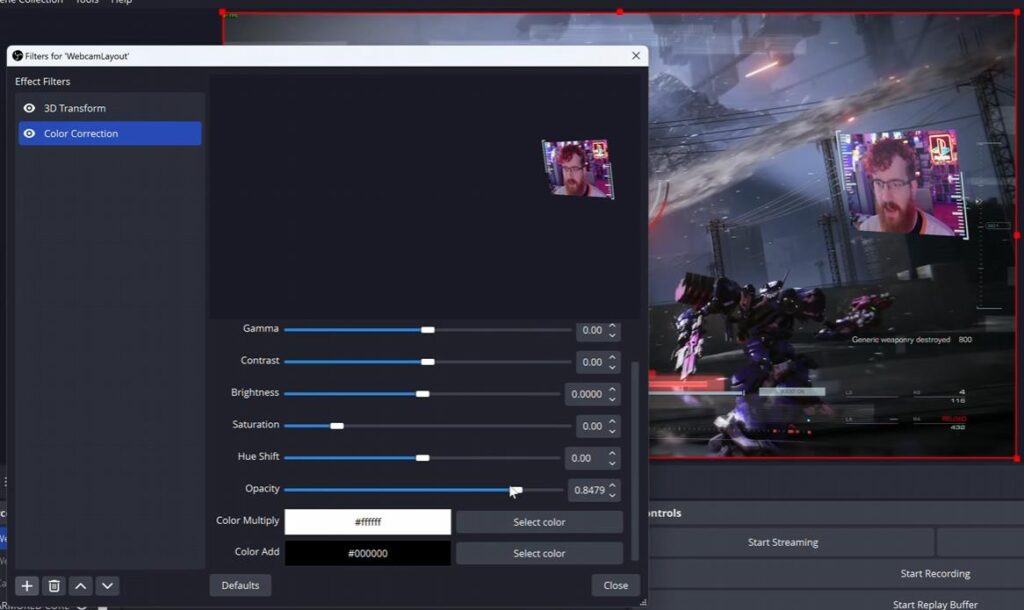
The Sci-Fi Look
Next, add a Color Correction filter and lower the opacity of your webcam, to emulate a translucent HUD element. You want to still be visible, but have some of the background layers show through.
Next we’ll set up a cool RGB desync/delay effect that I built my own shader for!
Go into your nested Webcam Overlay scene and add 3 new Source Clone sources (from the Source Clone plugin) for your webcam source. Call them “R,” “G,” and “B.”
Add a User-Defined Shader Filter to each of those 3 Source Clones and load my RGB Visibility shader. Isolate the individual Red, Green, and Blue channels for each appropriately-named source.
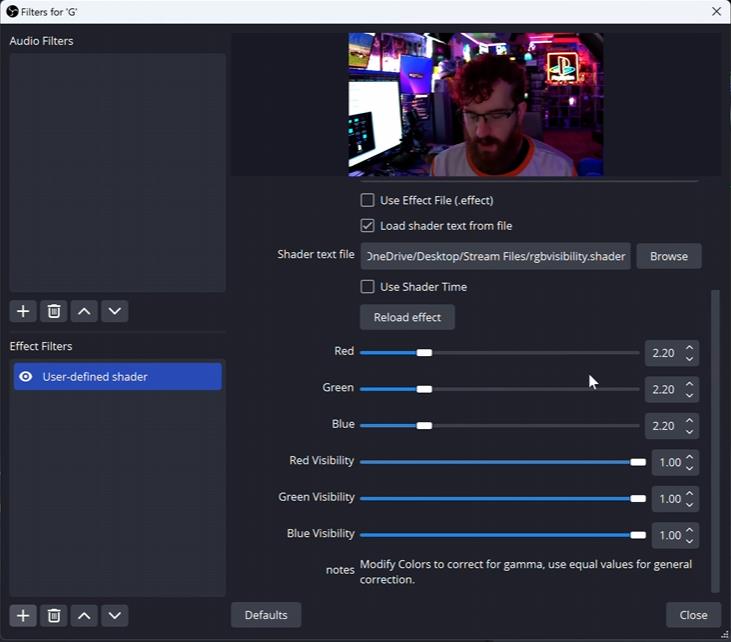
Then set the Gamma (the first 3 sliders in this shader) to around 1.25 for each color’s filter. Set the Blending Mode for each of these 3 Source Clones to Add.
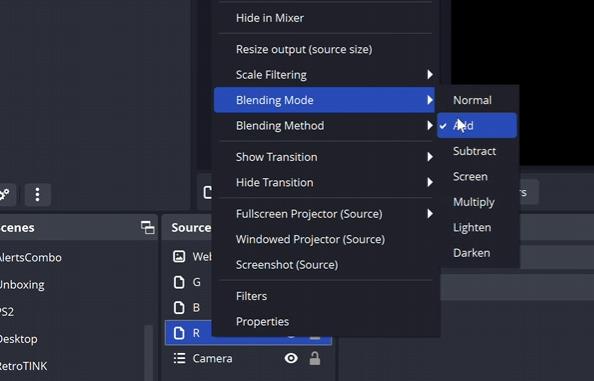
Make sure these are positioned above your original webcam source, but below the webcam frame PNG source.
Next add a new filter to each of these and choose “Render Delay.” Play around with the timings to get the separation that you want.
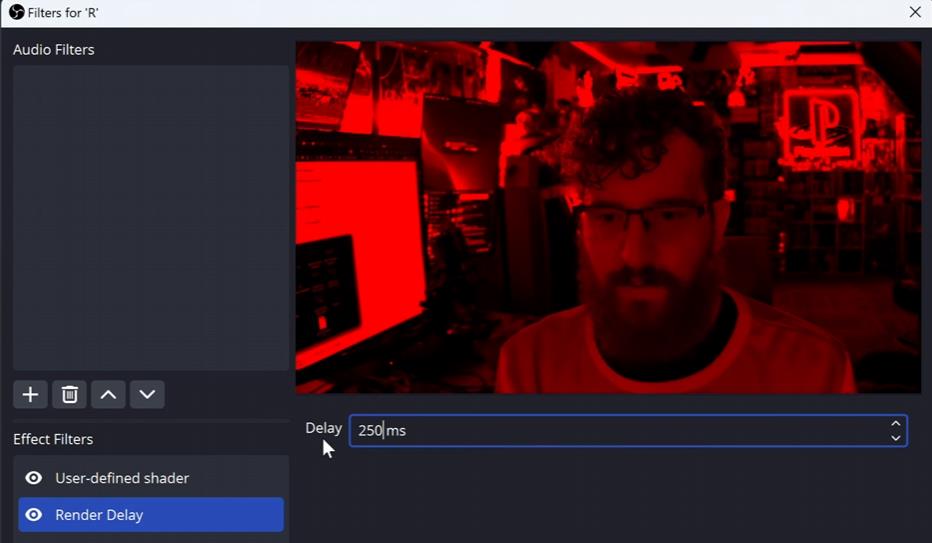
Make sure the render delays for each channel are different so they don’t just move in sync. This gives you the cool hologram-like RGB separation effect.
This has the secondary benefit of adding more fluidity to 30FPS webcams in a 60FPS stream, since more is moving each frame (rather than every 2 frames).
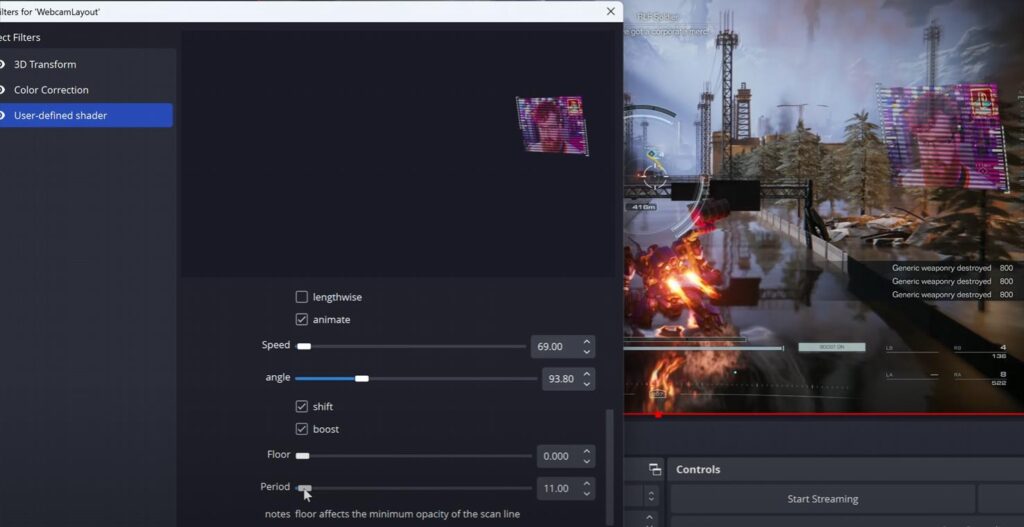
Next, go back to your gameplay scene and add a filter to the nested Webcam Overlay scene. Choose User-Defined Shader again and pick the Scan Line shader. Customize the settings to your liking.
Crash Effect
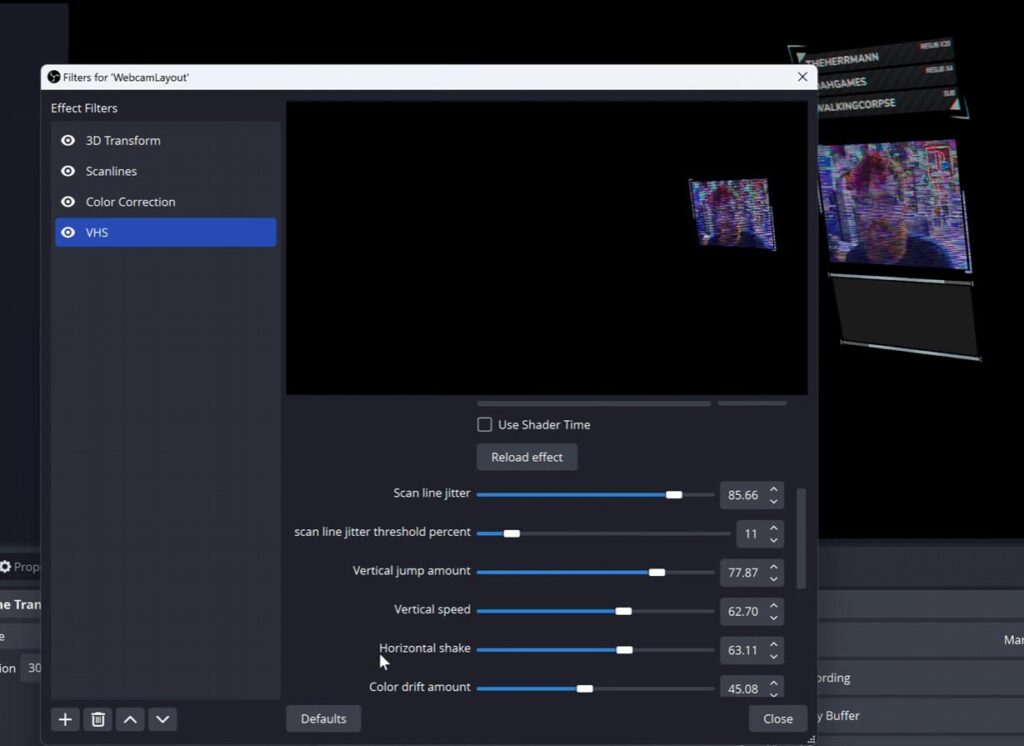
To simulate dying or crashing, experiment with adding other shaders like the VHS shader or analog glitch shader and really cranking it up. (Be sure to check “Apply to Alpha” if present in your shader options.)
Then add two Color Correction filters for opacity, reducing by some in the first, then all the way to 0 in the second.
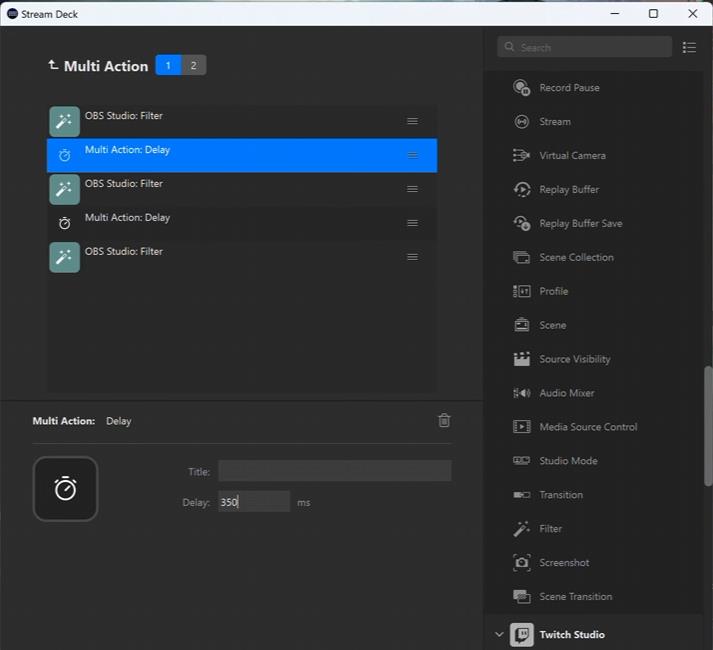
Then in the Elgato Stream Deck software (or your macro software of choice) add a new multi-action/macro that enables these 3 new filters with delays between them, with a second toggle to turn them back off with no delays.
That’s it! Enjoy, create something rad and share what you make with me!