At long last, an EASY way to record a single source without overlays (or multiple) from your streams! This is… awesome. Let’s check out the OBS Studio Source Record plugin by Exeldro and see how to best optimize it for your setups.
NOTE: This is a tutorial specifically for OBS Studio, not StreamLabs OBS. SLOBS already has a feature similar to this and does not support plugins.
The goal of this tutorial is to show you how to record an individual source in OBS, separate from your full scene. An example of this is a full, complicated stream layout with overlays and on-screen elements, and you just want to record your gameplay or webcam.
This could be done to make creating highlights easier, posting let’s plays to YouTube, or enabling higher-quality punch-ins for your camera during editing.
Install the Source Record plugin. [Here’s a video on how to install OBS plugins.]
Next, find the source you want to record in your sources list. Click “Filters.”

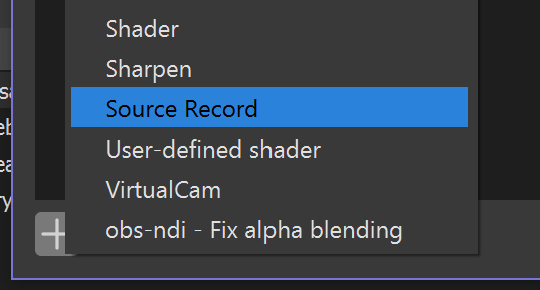
Next, click the plus icon under “Effect Filters” and choose “Source Record.”
This brings you to the meat and potatoes of this plugin. Here you can choose where your file is saved, formatting for the file name, the container it’s in, and so on.
My recommendations are as follows:
- Choose separate output locations for your main stream or recording and each individual Source Recording you set up or
- Add custom filename prefixes for each of your Source Recording files
(This is because otherwise you will end up with files that have the same name.) - Choose MKV for the container.
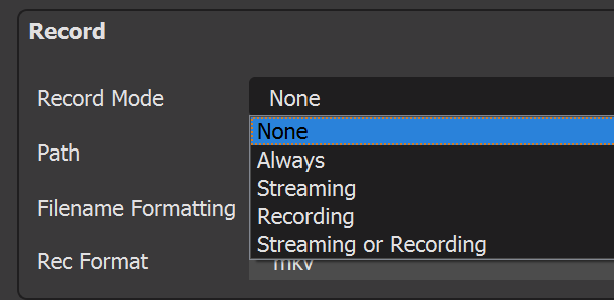
“Record Mode” is the option for different triggers to activate the source recording.
- “Always On” means as long as the filter is active, that source is recording.
You can then set up a toggle in Hotkeys to turn this on and off manually. - “Streaming” means this source will start recording as soon as you hit “Start Streaming” in OBS.
- “Recording” means this source will start recording as soon as you hit “Start Recording” in OBS.
- “Streaming or Recording” means this source will start recording as soon as you hit “Start Streaming” or “Start Recording” in OBS.
- “None” means it doesn’t record at all.
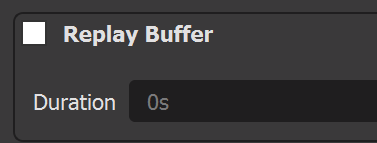
You also have access to the Replay Buffer so you can save out individual replays of your specific sources.
Instead of recording, you do have the option to stream a specific source to another location – such as a custom RTMP server running on another PC. This could be useful in education or corporate environments, but not for the average user.

Note: If you don’t check the “Different Audio” checkbox, you can record the same multi-track audio that is recorded in your normal Output -> Record settings.
Next, you have the option to manually specify an audio source from your existing audio sources, rather than the full audio mix. Useful for isolating your microphone or system sound.

Lastly, you have encoder choices for your source recording. This will include the encoders added by the StreamFX plugin, as well.
The default uses X264 with the “Ultrafast” CPU usage preset, which should be fairly lightweight on most CPUs.
You can use GPU encoding. On AMD, this is fine. For Nvidia NVENC, there are a couple considerations:
- “NVENC (new)” currently does not work. It records the entire scene instead of the individual source. So the normal “NVENC” option must be chosen, which utilizes the older implementation. This does not hurt quality but may perform slightly worse.
(This is not the case for either of StreamFX’s NVENC encoder choices.) - Consumer GeForce GPUs only allow you to utilize up to 3 NVENC sessions at a time (without patching/modding the drivers). This means you can only stream or record with NVENC 3 times at once, in any program. So if you stream with NVENC, that’s one session and you can only Source Record two more. If you stream with NVENC and record in a higher quality with NVENC, then you only have 1 encode session remaining for Source Record.
The exciting part is that you can use Source Record on multiple sources at the same time, allowing you to record your gameplay and webcam, along with your full stream, unlocking even more creative potential for edits. Plus, you have complete control over how and when these sources record.